
Use this venue setup checklist to run site visits, lock vendor sequencing, and execute a trouble-free load-in and event day. The single most important action to avoid day-of failure: complete a technical walkthrough before you sign anything, then run a second one 48 hours before load-in. Every other item on this list flows from those two moments.
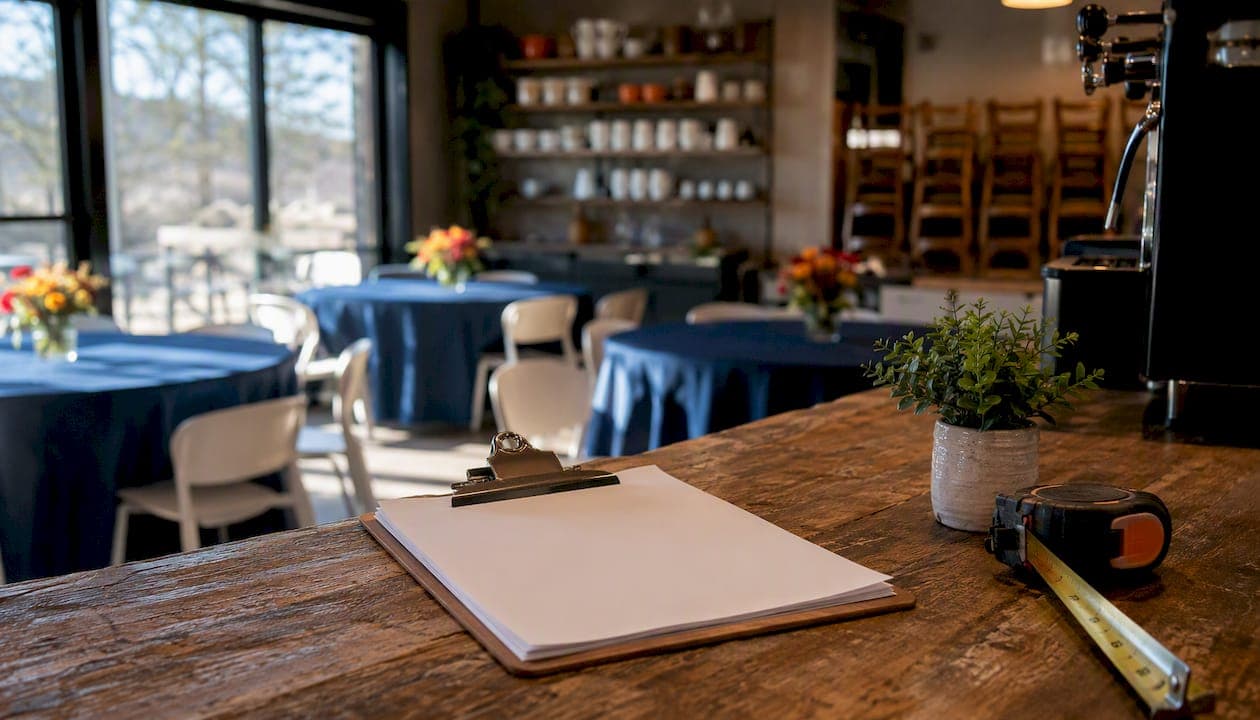
Here is your compact, phase-by-phase checklist. Print it, clip it to your site-visit clipboard, and check off each item in order.
Site Visit
- Confirm usable square footage against your layout (not just total capacity)
- Map every power outlet, circuit breaker, and dedicated panel
- Test Wi-Fi speed under simulated load (multiple devices streaming simultaneously)
- Measure loading dock door width, clearance height, and freight elevator capacity
- Walk every emergency exit and confirm signage is lit and unobstructed
- Note HVAC controls and ask for the thermostat override procedure
- Photograph the space from every guest sightline
Load-In
- Distribute the load-in sheet to all vendors 48 hours before arrival
- Stagger vendor arrival windows by at least 30 minutes at shared access points
- Assign a logistics lead to the loading dock for the full load-in window
- Confirm power connections before any AV equipment is powered on
- Test all microphones, speakers, and projectors through the actual room speakers
Day-Of Setup
- Run a full dry-run of the program at least 90 minutes before doors open
- Adjust HVAC to account for body heat from a full room
- Confirm all signage, wayfinding, and accessibility paths are clear
- Brief every staff lead on their role, radio channel, and emergency contact
Teardown
- Photograph the venue before a single item is removed
- Reverse the setup sequence: finishing touches out first, infrastructure last
- Complete a damage-report walkthrough with the venue manager before departure
- Collect all vendor receipts and signed departure confirmations
Pro Tip: Categorized, printable checklists split by phase (venue, AV, catering, teardown) produce far better on-site accountability than one long undifferentiated list. Print a separate sheet for each lead.
Key Takeaways
A reliable event comes down to one discipline: complete the technical walkthrough before you sign, then run a second one 48 hours before load-in. Every other item on the checklist supports those two moments.
| Point | Details |
|---|---|
| Technical walkthrough first | Inspect power, dock dimensions, Wi-Fi, and HVAC before signing any venue contract. |
| Phase your timeline | Work backward from doors-open: infrastructure in first, finishing touches last, with a 60-minute contingency buffer. |
| Sequence vendors by dependency | Infrastructure arrives before AV, AV before catering, catering before decor. Stagger shared access points by 30 minutes. |
| Distribute the load-in sheet 48 hours out | Written arrival windows and power requirements prevent the most common day-of coordination failures. |
| Thirdspacecoffee for Colorado Springs events | Offers in-house coffee service, flexible seating, and on-site staff at its single Colorado Springs location, supporting a small to medium guest count. |
Table of Contents
- What should you check before booking a venue?
- Timeline checklist: what needs to happen and when
- How do you coordinate vendors and manage load-in?
- What should you test during a venue site visit?
- How do you plan a venue layout for flow and sightlines?
- AV and production checklist: gear, backups, and crew roles
- Catering, F&B logistics, and guest experience checklist
- Day-before and day-of operations: the final 48 hours
- Post-event teardown, returns, and follow-up checklist
- Small-venue and café-specific setup checklist
- Health and safety compliance checklist
- How do you plan for bad weather or technical failures?
- How should staff and vendors communicate during the event?
- Security arrangements and crowd control measures
- Transportation and accommodation for out-of-town guests and staff
- What the checklist misses (and why that matters)
- Thirdspacecoffee: a venue that comes with the setup already figured out
- Sources
What should you check before booking a venue?
Venue selection should evaluate accessibility, capacity, logistics, and venue rules using a checklist so you can compare options on a like-for-like basis. Most planners get burned not by the venue they chose but by the contract terms they did not read carefully enough.
Operational selection checklist
- Usable space vs. stated capacity. A room rated for 300 may hold 180 comfortably in a banquet layout once you account for staging, service aisles, and a bar station. Measure the room yourself.
- Load-in access. Confirm the freight entrance location, hours of access, and whether a loading dock or street-level drop is available. Ask if the elevator is shared with hotel guests or other events.
- Parking and staging area. Count available spaces, confirm ADA-designated spots, and identify where vendor vehicles can stage during load-in without blocking guest arrival lanes.
- Power and HVAC limits. Request the venue's electrical specifications: total amperage, dedicated circuits, and panel locations. Confirm the HVAC system can handle a full room.
- ADA and accessibility basics. Confirm ramp access, elevator availability, accessible restrooms, and the path from parking to the main event space.
Contract essentials to negotiate before you sign
The venue walkthrough checklist from Expo Pass makes clear that a second pre-event walkthrough should confirm load-in timing and power placement. Before that walkthrough happens, your contract needs to lock in the following:
- Setup and teardown windows (get exact start and end times, not just "the day of")
- Overtime fees and the rate per hour if you run long
- Certificate of insurance requirements and whether the venue needs to be named as additionally insured
- Approved vendor list and any exclusivity clauses for catering or AV
- Alcohol policy: licensed bartenders, last-call time, and whether outside alcohol is permitted
- Minimum spend requirements and what counts toward them
- Hidden fees: cleaning, security, coat check, parking validation, and Wi-Fi
Get in writing: setup window start time, approved vendor list, power map delivery date, and the name of your day-of venue contact. Verbal confirmations evaporate.
Pro Tip: During your pre-contract walkthrough, bring a tape measure, a phone charger to test outlets, and a portable speaker to test acoustics. You will learn more in 20 minutes of active testing than in an hour of questions.
For a deeper venue booking guide, the Thirdspacecoffee blog covers step-by-step procedures that align with these selection criteria.
Timeline checklist: what needs to happen and when
Successful venue preparation depends on timing, coordination, and readiness checks. Plan a four-week preparation window at minimum, and finalize logistics in the week before setup with repeat confirmations at each milestone.
| Timeframe | Key milestones |
|---|---|
| 3+ months out | Venue contract signed; permits applied for; vendor shortlists confirmed |
| 6–8 weeks out | Floorplan finalized; AV and catering contracts signed; power map requested |
| 3–4 weeks out | Staffing confirmed; load-in schedule drafted; insurance certificates collected |
| 7 days out | Vendor arrival windows distributed; final headcount to catering; AV content delivered |
| 48–24 hours out | Confirm all vendor arrival windows; final power and AV checks; staffing call |
| Day-of setup | Load-in begins; AV dry run; HVAC adjusted; final walkthrough before doors open |
Phased milestone tasks
- 3+ months out. Sign the venue contract with setup/teardown windows locked. Apply for any local permits (special event, noise, alcohol). Begin vendor outreach and collect certificates of insurance.
- 6–8 weeks out. Finalize the floorplan and share it with every vendor. Request the venue's power map. Confirm AV and catering contracts. Book staffing through your agency or internal team.
- 3–4 weeks out. Draft the load-in schedule with vendor arrival windows. Collect all vendor insurance certificates. Confirm staffing assignments and brief leads on their roles.
- 7 days out. Distribute the load-in sheet to all vendors. Deliver final AV content (slides, video files, music playlists) to the AV lead. Send final headcount to catering.
- 48–24 hours out. Call or message every vendor to confirm arrival windows. Run a final power and AV check at the venue. Confirm all staff are briefed and have the run-of-show.
- Day-of setup. Execute load-in in vendor sequence order. Run a full AV dry run. Adjust HVAC. Complete a final walkthrough with every lead signing off their area before doors open.
Sample run-of-show template
- 6:00 AM — Venue access begins; logistics lead on-site
- 6:00–8:00 AM — Infrastructure vendors (staging, pipe and drape, power distribution)
- 8:00–10:00 AM — AV load-in and cable runs
- 10:00 AM–12:00 PM — Catering setup, linen, and furniture placement
- 12:00–1:00 PM — Decor and finishing touches
- 1:00–2:00 PM — Full AV dry run and content run-through
- 2:00–3:00 PM — Final walkthrough; all leads sign off
- 3:00 PM — Doors open to guests
- Buffer: Build a 60-minute contingency window before doors open. If load-in runs on time, use it for a second dry run. If it does not, you will need every minute.
How do you coordinate vendors and manage load-in?
Setup and teardown require their own sequence plans: map access points, build vendor arrival order by dependency, and communicate the schedule in writing to prevent delays. A missed load-in window cascades fast.
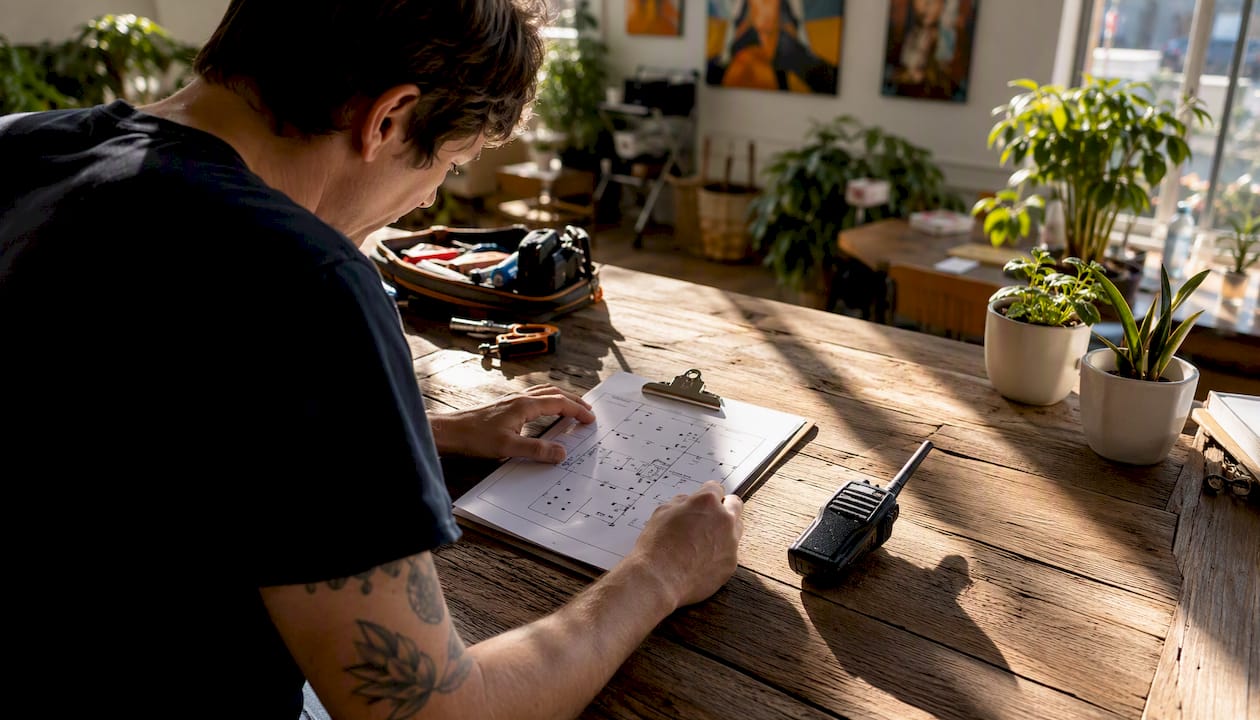
Sequence vendors by dependency, not by convenience. Infrastructure comes first because nothing else can be placed until the staging, power distribution, and rigging are in position.
Vendor arrival sequence:
- Infrastructure (staging, trussing, power distribution, pipe and drape)
- Heavy equipment (AV, lighting rigs, large furniture)
- Catering (kitchen setup, bar build-out, linen)
- Decor and signage
- Finishing touches (floral, table settings, printed materials)
What to include on every load-in sheet:
- Vendor name and contact (cell phone, not office line)
- Arrival window (30–60 minutes, not a single time)
- Vehicle count and type (box truck, cargo van, passenger vehicle)
- Assigned access point and parking location
- Power requirements (amperage, outlet type, location needed)
- Departure window for load-out
Stagger vendors sharing a single access point by at least 30 minutes. Two box trucks arriving simultaneously at a single loading dock is one of the most common and most preventable day-of failures.
Pro Tip: Send a confirmation request 48 hours before load-in and ask each vendor to reply with their confirmed arrival time and vehicle count. Use a corporate event vendor checklist to track responses. A vendor who does not reply within 24 hours gets a phone call, not a follow-up email.
What should you test during a venue site visit?
Most planners focus on how a room looks and forget to treat the site visit as a technical inspection. Power circuits, loading dock dimensions, and Wi-Fi capacity under load are the items that cause failures on event day. A thorough walkthrough should inspect space, technical infrastructure, logistics, and contract details before signing.
Power checklist:
- Location of every outlet in the event space (photograph and annotate on the floorplan)
- Circuit amperage for each outlet cluster
- Location of the main breaker panel and who holds the key
- Dedicated circuits for AV, catering, and lighting (confirm they are on separate breakers)
- Request a power map from the venue's facilities team
Loading dock and freight path:
- Door width and clearance height (measure, do not estimate)
- Freight elevator capacity in pounds and interior dimensions
- Distance from dock to event space (affects labor time and equipment needed)
- Dock hours and whether a venue staff member must be present
Wi-Fi and bandwidth:
- Run a speed test on the venue's network with multiple devices connected simultaneously
- Ask whether a dedicated event network is available and at what cost
- Confirm upload speed if live streaming is part of the program
- Identify dead zones and plan for cellular backup or a portable hotspot
HVAC, lighting, and acoustics:
- Ask for the HVAC override procedure and who controls it during the event
- Test every light switch and confirm dimmer compatibility with your lighting rig
- Identify rigging points and confirm weight limits in writing
- Clap loudly in the room and listen for echo; a highly reverberant room needs acoustic treatment or a different speaker placement
| Infrastructure item | What to measure or test | Why it matters |
|---|---|---|
| Outlet circuits | Amperage per circuit | Prevents tripped breakers during peak load |
| Loading dock door | Width and clearance height | Determines what equipment can enter |
| Freight elevator | Interior dimensions and weight limit | Affects staging and AV transport |
| Wi-Fi network | Speed under multi-device load | Prevents streaming and registration failures |
| HVAC system | Thermostat location and override access | Room temperature shifts dramatically at full capacity |
| Ceiling rigging points | Location and weight rating | Required for lighting and trussing |
How do you plan a venue layout for flow and sightlines?
The layout choice drives every other setup decision: staffing positions, service flow, AV placement, and aisle widths all change depending on whether you are running a seated dinner, a theater-style presentation, an expo, or a cocktail reception.
Layout by format:
- Seated dinner (banquet rounds). Rounds of 8–10 with 60-inch tables. Allow 18 inches of clearance between chairs at adjacent tables. Service aisles need 5 feet minimum for two-way cart traffic.
- Theater style. Rows of chairs facing a stage. Allow 3 feet between rows for comfortable egress. Sightlines degrade past 12–14 rows without a raised stage or tiered seating.
- Expo or trade show. 10x10 booth footprints with 8-foot aisles for two-way traffic. Wider main aisles (12 feet) at entrances and near high-traffic exhibitors.
- Cocktail reception. Standing room with high-top tables clustered to create conversation zones. Keep 30–40% of the floor open for circulation.
Floorplan checklist:
- Aisle widths: minimum 36 inches for ADA compliance, 60 inches for wheelchair-accessible aisles
- Stage access: a clear path from backstage to the stage lip, separate from guest circulation
- Coat check and registration: placed at the entrance, not inside the main event space
- Restroom wayfinding: signage visible from every major gathering point
- Emergency exits: unobstructed and clearly marked from every seating section
Accessibility beyond ADA basics:
- Assistive listening devices (ALDs): confirm the venue has a hearing loop or FM system, or plan to bring a portable ALD system
- Wheelchair viewing areas: designated spaces at the front or sides with clear sightlines, not tucked behind a pillar
- Mobility assistance path: a smooth, unobstructed route from parking through registration to the main space
- Check all signage contrast against the WebAIM Contrast Checker to confirm readability for attendees with low vision
Pro tip for floorplan annotation: Draw your floorplan to scale and annotate every dimension you measured on-site: ceiling height, column locations, outlet positions, and door swing directions. A floorplan missing those details will produce a layout that looks perfect on paper and fails in the room.
AV and production checklist: gear, backups, and crew roles
AV failures are almost always preventable. The cause is usually one of three things: equipment that was never tested in the actual room, a cable or adapter that was not packed, or a crew member who did not know their role. Fix all three before load-in day.
Essential equipment list:
- Wireless handheld microphones (minimum two, plus one wired backup)
- Lavalier microphones for presenters who need hands-free
- Audio mixer with enough channels for all mic inputs plus playback
- Main speakers and monitors (confirm impedance matches the mixer output)
- Projector or LED screen with resolution matched to presentation files
- Playback laptop with all content pre-loaded and tested
- HDMI, DisplayPort, and USB-C adapters (bring every type)
- Extension cables and power strips (confirm with venue before using)
- Gaffer tape, cable ramps, and tie wraps for cable management
Backup and redundancy plan:
- A second laptop with all content mirrored, powered on and ready
- Spare wireless microphone transmitters and fresh batteries for every unit
- A direct-input (DI) box for acoustic instruments or backup audio sources
- Printed speaker notes for every presenter in case display fails entirely
On-site crew roles:
- AV lead. Owns all technical equipment, runs the dry run, and is the single point of contact for presenter tech needs during the event.
- Stage manager. Manages presenter flow, cues the AV lead for transitions, and keeps the run-of-show on time.
- Production assistant. Handles cable management, runner tasks, and monitors the back of the room for audio and visual issues.
Dry run schedule:
- Complete all cable runs and speaker placement before the dry run begins.
- Test every microphone at speaking volume from the presenter's position on stage.
- Run the full presentation deck from the presenter laptop, advancing every slide.
- Play all video files and confirm audio levels through the room speakers.
- Test the backup laptop with the same content.
- Walk to the back of the room and listen for coverage gaps or feedback.
Schedule the dry run at least 90 minutes before doors open. If a problem surfaces during the dry run, you need time to fix it.
Catering, F&B logistics, and guest experience checklist
Catering setup decisions affect the room layout, power allocation, and guest flow. Get the catering lead involved in the floorplan conversation early, not after the furniture is already placed.
Kitchen and service check:
- Confirm cold storage capacity (refrigerators, ice bins) against the menu volume
- Identify warming equipment power requirements and assign dedicated circuits
- Map the service line flow: kitchen exit to plating station to guest-facing service point
- Confirm the path from kitchen to tables does not cross guest circulation aisles
Dietary needs and allergen management:
- Collect dietary restrictions during registration, not at the door
- Label every dish with allergen information using a consistent format (bold the top-9 allergens)
- Set up separate stations for common allergen-free options (gluten-free, nut-free)
- Brief every service staff member on the menu and which dishes contain which allergens
- For festive or seasonal menus, a resource like Wild Foodz's festive meal offerings guide can help planners build varied menus that accommodate common restrictions
Bar and alcohol logistics:
- Confirm the venue's liquor license covers your event type and hours
- Verify that bartenders hold the required state certification (TIPS, ServSafe Alcohol, or equivalent)
- Place the bar away from the main entrance to prevent a bottleneck at arrival
- Plan glassware flow: clean glasses in, dirty glasses out, without crossing service paths
- Track minimum spend requirements and confirm what counts toward the total
Guest communications and signage:
- Send arrival instructions (parking, entrance location, check-in procedure) 48 hours before the event
- Post Wi-Fi network name and password at check-in and at tables
- Place restroom indicators at every decision point (hallway intersections, near registration)
- Mark dietary-labeled stations with signage visible from the service line approach
Day-before and day-of operations: the final 48 hours
The 48 hours before an event are when plans either hold or fall apart. Finalize logistics in the week before setup and run end-to-end tests prior to guest arrival.
48–24 hour checks:
- Call every vendor to confirm arrival window, vehicle count, and contact name
- Run a final power and AV check at the venue (bring your own equipment if needed)
- Confirm all staff assignments and share the final run-of-show with every lead
- Verify that permits and insurance certificates are on-site or accessible digitally
- Confirm the venue's day-of contact name and cell phone number
Hour-by-hour run-of-show (sample, 300-person conference):
- 6:00 AM — Logistics lead on-site; venue access confirmed
- 6:00–8:00 AM — Infrastructure load-in (staging, power distribution)
- 8:00–10:00 AM — AV load-in; cable runs complete
- 10:00 AM–12:00 PM — Catering setup; furniture and linen placement
- 12:00–1:00 PM — Decor and signage; registration table setup
- 1:00–2:00 PM — Full AV dry run; content run-through with presenters
- 2:00–2:30 PM — Final walkthrough; each lead signs off their area
- 2:30–3:00 PM — Contingency buffer
- 3:00 PM — Doors open; registration begins
Staffing roles:
- Logistics lead. Owns the load-in sequence, dock access, and vendor coordination.
- AV lead. Owns all technical equipment and presenter support.
- Catering lead. Manages kitchen, service flow, and dietary accommodations.
- Registration lead. Manages check-in, badge distribution, and guest flow at the entrance.
- Teardown lead. Briefed on the teardown sequence before the event begins.
Emergency checklist:
- First-aid kit location confirmed and stocked
- Nearest hospital address shared with all leads
- Security contact name and radio channel
- Evacuation route posted at every exit and briefed to all staff
- Incident reporting procedure: who documents, who contacts the venue, who contacts the client
Post-event teardown, returns, and follow-up checklist
Teardown is where deposits get lost. A rushed, unsequenced teardown produces damaged furniture, missing equipment, and a venue manager who disputes your damage report because nothing was documented.
Teardown sequence:
- Photograph the entire venue before removing a single item. Timestamped photos are your protection.
- Remove finishing touches first: floral, printed materials, decor items
- Strike catering: clear tables, pack glassware, remove warming equipment
- Strike AV: coil cables, pack equipment in cases, remove cable ramps and gaffer tape residue
- Strike infrastructure last: staging, pipe and drape, power distribution
- Assign a teardown lead to the loading dock to manage vendor departure order
Vendor departure:
- Stagger vendor departure windows the same way you staggered arrivals
- Collect a signed departure confirmation from each vendor before they leave
- Note any items left behind and photograph them with a timestamp
Damage report and venue hand-off:
- Walk the venue with the venue manager before your team leaves
- Document any pre-existing damage (you photographed it at load-in, so this is a comparison)
- Complete the venue's damage report form and keep a copy
- Confirm deposit return timeline and the process for disputing any charges
Post-event follow-up:
- Send vendor invoices for payment within the contract terms
- Process equipment returns and confirm receipt with rental companies
- Schedule a client debrief within 48 hours while details are fresh
- Send a satisfaction follow-up to attendees if the event format warrants it
Small-venue and café-specific setup checklist
Small and multi-use venues like coffee shops require a scaled-down version of the full checklist, with a sharper focus on the constraints that matter most: limited power, a single loading door, flexible seating, neighborhood parking, and guest flow through a compact space. For planners new to coffee shop event rentals, the priorities shift noticeably from a hotel ballroom setup.
Small-venue priorities:
- Power. A café typically has 15–20 amp circuits shared with kitchen equipment. Confirm which circuits are available for event use before committing to any AV or lighting rig.
- Loading access. Most cafés have a single front or rear entrance. Schedule vendor load-in before the café opens or after it closes to avoid blocking customer traffic.
- Seating flexibility. Café furniture is usually lightweight and reconfigurable. Plan the layout swap in advance and confirm with the venue how much time is allocated for the furniture transition.
- Neighborhood parking. Street parking and nearby lots vary by time of day. Share a parking map with guests in the pre-event communication.
- Guest flow. In a compact space, the path from entrance to seating to restroom to exit needs to be clear of service equipment at all times.
Café event setup checklist:
- Confirm table layout swap plan and who executes it (venue staff or your team)
- Test the sound system or portable speaker at the volume you need; café acoustics are often reflective
- Confirm seating capacity against the venue's fire occupancy limit
- Place portable signage at the entrance and at any interior decision points
- Confirm the pickup and service flow for food and beverages so it does not cross guest circulation
- Check that the restroom path is clear and signed
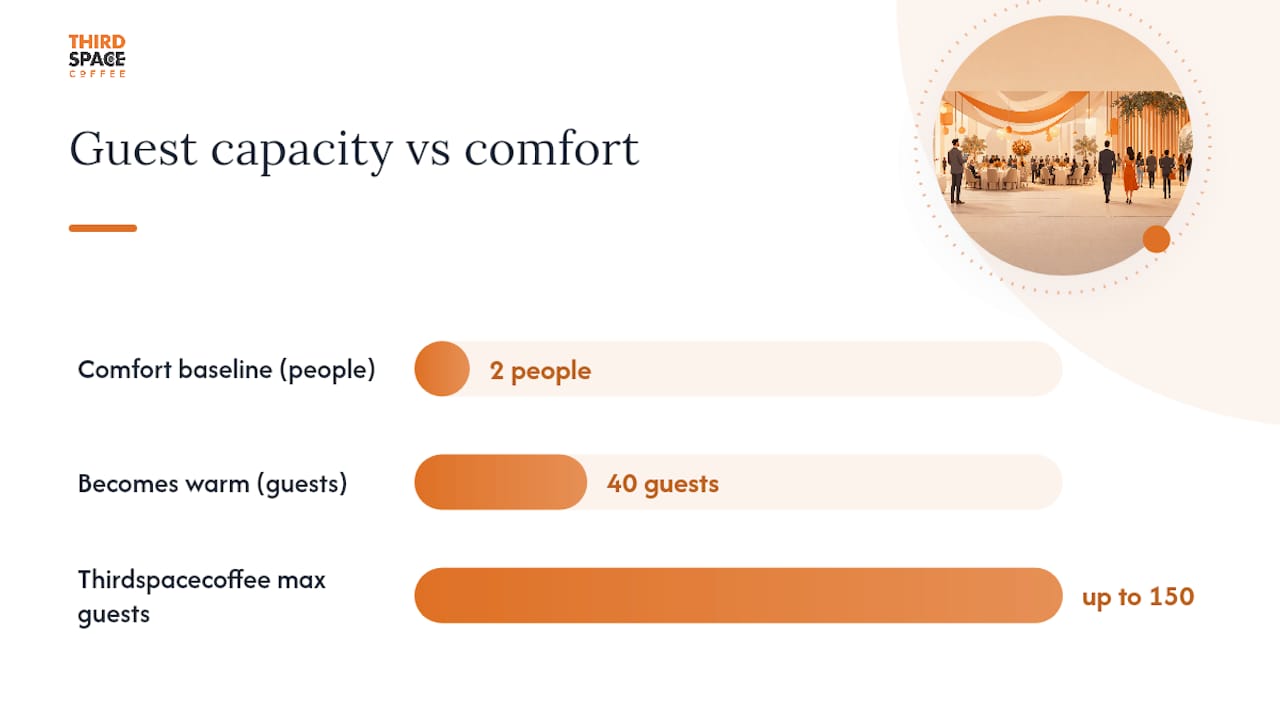
Pro Tip: Café hosts commonly miss the HVAC behavior in a full room. A space that feels comfortable with two people in it can become uncomfortably warm with 40 guests and a running espresso machine. Ask the venue host about the HVAC override and plan to adjust it 30 minutes before guests arrive.
Thirdspacecoffee hosts events for up to 150 guests at its Colorado Springs location. The event-ready café guide on the Thirdspacecoffee blog covers what a café needs to provide to be genuinely event-ready, including power, sound, and service flow considerations.
Health and safety compliance checklist
Health and safety compliance is not a box to check the morning of the event. It requires verification during the site visit, confirmation during load-in, and a final check before doors open.
Fire safety:
- All emergency exits unobstructed and clearly marked with illuminated signage
- Fire extinguisher locations confirmed and inspections current (check the tag)
- Maximum occupancy posted and enforced at registration
- No equipment, cables, or decor blocking exit paths
First aid:
- First-aid kit stocked and accessible to all staff leads
- At least one staff member with current first-aid or CPR certification on-site
- Nearest emergency room address and phone number shared with all leads
- AED (automated external defibrillator) location confirmed if the venue has one
COVID-19 and respiratory illness protocols (current guidance):
- Follow current CDC guidance for indoor gatherings, which as of 2026 does not mandate masking for most events but recommends ventilation improvements
- Confirm the venue's HVAC system provides adequate air changes per hour for the expected occupancy
- Make hand sanitizer available at registration, food stations, and restrooms
- Have a plan for a guest who becomes ill during the event: a designated quiet space, a contact for medical assistance, and a protocol for notifying the venue
General compliance:
- Confirm all vendor staff hold required food handler certifications
- Verify alcohol service complies with state and local licensing requirements
- Confirm the venue's certificate of occupancy covers your event type and capacity
How do you plan for bad weather or technical failures?
Contingency planning is the section most planners write last and need first. Build your contingency triggers into the run-of-show so every lead knows exactly when to activate a backup plan without waiting for a decision from the top.
Weather contingency:
- For outdoor or partially outdoor events, identify an indoor backup space and confirm its availability in writing before the event
- Set a weather decision deadline: the latest time you can activate the backup plan without disrupting the guest experience (typically 4–6 hours before doors open)
- Communicate the contingency plan to all vendors and staff in the load-in sheet so no one is surprised by a venue change
- For events in Colorado, afternoon thunderstorms are a near-daily occurrence in summer. Build a 60-minute weather window into the run-of-show for any outdoor component
Technical failure contingency:
- AV failure: backup laptop powered on and mirrored, backup microphone ready, printed speaker notes available
- Power failure: identify the breaker panel location and the venue's emergency contact for electrical issues; have a battery-powered PA system for critical announcements
- Wi-Fi failure: cellular hotspot as backup for registration systems; offline check-in list printed and ready
- Catering failure (late delivery, equipment breakdown): identify a local backup caterer or grocery option for basic refreshments; confirm the venue has a microwave and refrigerator available
Review common event setup mistakes before finalizing your contingency plan. Many of the most disruptive failures are predictable and preventable with a single backup item or a confirmed alternate contact.
How should staff and vendors communicate during the event?
Verbal confirmations during a live event are unreliable. The noise level, the pace, and the number of simultaneous conversations make it nearly impossible to track who confirmed what. Build a communication system before the event starts.
Communication channels by role:
- Radios (two-way). Assign a channel to each functional team (logistics, AV, catering, registration). Cross-channel communication goes through the logistics lead only.
- Group text thread. A single thread for all leads, used for non-urgent updates and timestamped confirmations ("AV dry run complete, 1:47 PM").
- Direct cell. Reserved for emergencies and vendor-to-lead communication outside the event space.
Status confirmation protocol:
- Each lead posts a timestamped confirmation to the group thread when their area is ready ("Registration table set, 2:15 PM").
- The logistics lead does not open doors until all leads have posted their confirmation.
- Any issue that cannot be resolved within 10 minutes gets escalated to the logistics lead immediately, not after the fact.
Vendor communication during the event:
- Every vendor on-site has the logistics lead's cell number.
- The logistics lead has every vendor's cell number, not just the company's main line.
- Catering lead and AV lead communicate directly for timing cues (when to start service, when to dim lights for a presentation).
A shared digital status document or group thread where leads post timestamped confirmations creates an indisputable record of readiness and eliminates the "I thought you handled it" problem.
Security arrangements and crowd control measures
Security planning scales with event size and type, but every event needs at least a basic plan. A 50-person private dinner needs different measures than a 500-person public conference, but both need someone responsible for each of the following.
Security checklist:
- Identify the security lead and their radio channel before load-in begins
- Confirm the venue's existing security staff and their responsibilities (they may not cover your event specifically)
- For events over 150 guests, contract a licensed security firm and brief them on the event format, VIP guests, and any known concerns
- Place security personnel at the main entrance, near the bar, and at any restricted-access areas (backstage, speaker green room, storage)
- Establish a clear protocol for removing a disruptive guest: who makes the call, who executes it, and how it is documented
Crowd control and flow:
- Use stanchions or furniture placement to create defined entry and exit paths
- Avoid a single-point bottleneck at registration: use multiple check-in stations for events over 100 guests
- Brief registration staff on the maximum occupancy limit and how to communicate it to guests if the room reaches capacity
- For events with alcohol service, confirm the venue's policy on re-entry and communicate it to guests at check-in
Transportation and accommodation for out-of-town guests and staff
Out-of-town logistics are easy to underestimate. A guest who cannot find parking or misses a shuttle is a guest who arrives stressed and late. A staff member who cannot get to the venue on time is a staffing gap at the worst possible moment.
Guest transportation:
- Share a transportation guide with guests in the pre-event communication: nearest airport, recommended rideshare drop-off point, parking options with rates, and public transit routes if applicable
- For events with significant out-of-town attendance, negotiate a hotel room block at a nearby property and include the booking link in guest communications
- If the venue is not walkable from the hotel block, arrange a shuttle and include the schedule in guest communications
Staff transportation and accommodation:
- Confirm that every staff member has reliable transportation to the venue for the load-in call time, which is often before public transit operates
- For multi-day events, book staff accommodation at or near the venue and confirm check-in times align with the setup schedule
- Share a staff-specific transportation guide that includes the freight entrance location, parking for staff vehicles, and the load-in call time
Accommodation considerations:
- Negotiate a hotel room block early: popular properties near event venues fill quickly, especially for weekend events
- Confirm the hotel's check-in and check-out times against your event schedule; a staff member who cannot check in until 3:00 PM on a 6:00 AM setup day needs an alternative plan
- For Colorado Springs events, downtown hotels and properties near the Colorado Convention Center are the most practical options for events at venues in the central corridor
What the checklist misses (and why that matters)
Most venue setup checklists are built for hotel ballrooms. They assume a dedicated loading dock, a separate kitchen, a house AV system, and a venue coordinator who has done this a hundred times. Those assumptions fail the moment you book a non-traditional space.
The items that consistently get missed are not the glamorous ones. They are the freight elevator dimensions that determine whether your staging fits. The circuit amperage that determines whether your lighting rig trips the breaker. The HVAC override that determines whether your guests are comfortable or miserable. Treating the site visit as a technical inspection rather than a tour is the single habit that separates planners who have smooth events from planners who spend the first hour of setup solving problems that should have been solved weeks earlier.
Vendor coordination is the other consistent failure point. Sharing a detailed load-in schedule 48 hours before setup reduces day-of surprises more reliably than any other single action. The vendors who cause problems on event day are almost always the ones who did not receive a clear schedule, not the ones who received one and ignored it.
One more thing worth saying plainly: the final walkthrough is not a formality. Run audio through the actual speakers. Flip every light switch. Verify table placements against the seating chart. A walkthrough where you observe the room is not the same as a walkthrough where you test it.
Thirdspacecoffee: a venue that comes with the setup already figured out
Planning an event in Colorado Springs and want a space where the infrastructure questions are already answered? Thirdspacecoffee holds up to 150 guests at its single Colorado Springs location, with in-house roasted coffee and espresso service, a food menu, and a team that has hosted everything from corporate meetings to private parties.

The space handles the basics that trip up small-venue planners: power for AV and catering, flexible seating configurations, and on-site staff who know the room. Specialty drinks are available for event service, so you are not coordinating a separate beverage vendor. The meeting room works for small groups; the full event space scales to a modest event size suitable for many gatherings.
To start a booking conversation, visit Thirdspacecoffee with your headcount, preferred date, and event format in hand. The team can confirm availability and walk you through what the space includes before you commit to anything.
Sources
The following resources support the checklists and guidance in this article. Use them for further reading, template downloads, and accessibility verification.
- The Complete Venue Walkthrough Checklist: What to Inspect Before You Sign — Expo Pass
- Prepare Hotel or Venue for Event: Complete Setup Guide
- The Ultimate Event Setup Checklist Template | ChecklistGuro
- Contrast Checker — WebAIM
- How to choose a venue for a corporate event or meeting: 12 things to consider — IACC