 how-to
Coffee Roasting Process Explained Simply
Table of Contents
- What is Coffee Roasting?
- The Three Stages of Coffee Roasting Process
- Coffee Roast Levels Explained
- How to Roast Coffee Beans at Home
- Best Coffee Beans for Home Brewing
- Common Home Roasting Mistakes to Avoid
- Why Fresh Roasted Coffee Matters
- Frequently Asked Questions
Last Updated: August 21, 2026
What is Coffee Roasting?
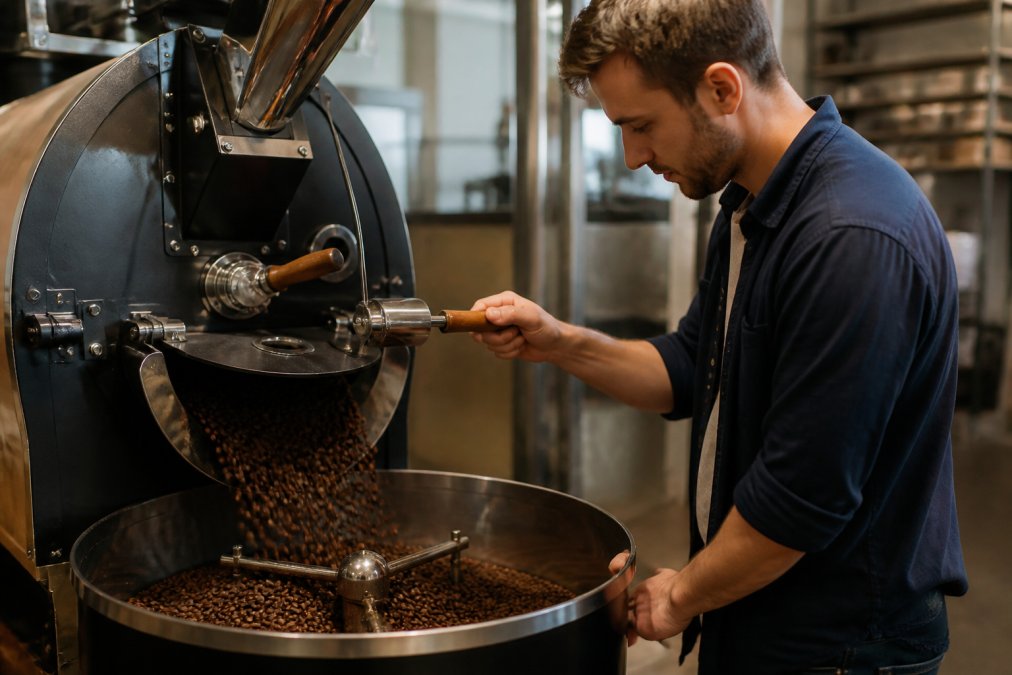
Coffee roasting is the process of heating green coffee beans to transform them from raw seeds into aromatic, flavorful beans. During roasting, starches convert to sugars, oils develop, and hundreds of flavor compounds emerge through the Maillard reaction. Controlled heat application triggers a cascade of reactions that determine the final taste, body, and aroma of your cup.
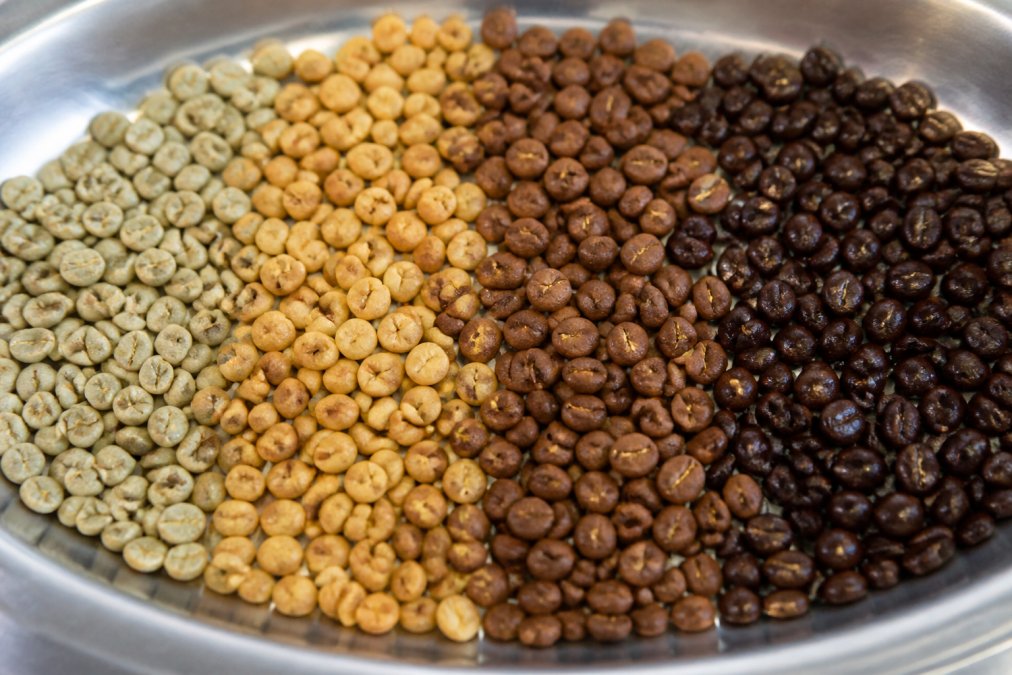
At Third Space Coffee, we understand that fresh roasting matters because it captures the full potential of each bean. Within two weeks of roasting, volatile aromatic compounds begin to fade (peer-reviewed research). This is why in-house roasting delivers a noticeably brighter, more complex cup.
The coffee roasting process follows distinct stages, each with its own temperature ranges, visual cues, and chemical transformations. Understanding these stages helps you appreciate why roast level affects flavor so dramatically.
The Three Stages of Coffee Roasting Process
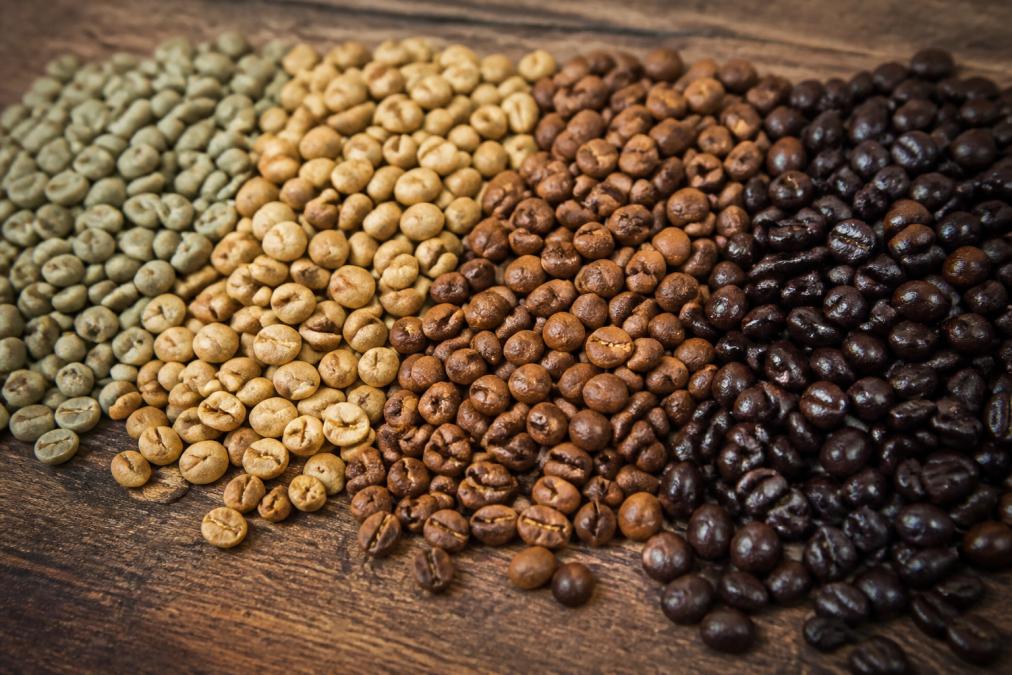
The coffee roasting process breaks into three distinct phases: drying, browning, and development. Each stage has a specific purpose and visual markers.
Stage 1: The Drying Phase
When green coffee beans enter the roaster, they contain roughly 10-12% moisture (peer-reviewed research). The drying phase lasts about 4-6 minutes and removes most of this water. The beans remain pale greenish-gray as the roaster temperature climbs from room temperature to around 300°F.
The beans lose water through evaporation, but little flavor development occurs yet. You'll hear subtle cracking sounds as the bean structure weakens from moisture loss, and the beans emit a grassy, hay-like aroma. Visually, watch for the beans to transition from pale color toward light tan with a relatively smooth surface. Extending this phase too long risks uneven roasting later.
Stage 2: The Browning Phase
Once the beans reach approximately 300°F (around 6-8 minutes into the roast), the browning phase begins. The beans turn from tan to light brown, then medium brown. The Maillard reaction creates hundreds of new flavor compounds, filling the roaster with rich, toasted coffee aroma. Sugars caramelize, proteins break down and recombine, and the bean's body intensifies.
The rate of temperature rise matters enormously here. Too fast, and the outside browns while the inside remains underdeveloped. Too slow, and you lose the brightness that makes light and medium roasts appealing. The browning phase typically lasts 3-5 minutes. Toward the end, beans begin to expand and develop a slightly oily surface. The first crack, a distinct popping sound, marks the transition from light to light-medium roast. Many specialty roasters deliberately stop here to preserve acidity and origin flavors.
Stage 3: The Development Phase
After the first crack, you've entered development. The beans continue to brown, oils migrate to the surface, and deeper, darker flavors emerge. A light roast stops shortly after first crack. A medium roast continues another 1-2 minutes. A dark roast pushes past the second crack at approximately 415°F, where bitter, smoky notes dominate.
Development time is critical. Extend it too long and you lose origin character. Cut it short and the roast tastes thin and sour. The sweet spot depends on the bean's density, size, and moisture content. A denser bean from higher altitudes develops more slowly than a lighter one.
Coffee Roast Levels Explained
Roast level is determined by when you stop the roasting process. The longer you roast, the darker the bean and the more the original flavor gets buried under roasted and caramelized notes.
Light roast: Stopped shortly after the first crack at an internal bean temperature around 390-400°F. The surface remains mostly dry. Light roasts preserve acidity and origin flavors, you taste the terroir, altitude, and soil. These beans are ideal for experiencing the coffee's unique characteristics, often with floral or fruity notes.
Medium roast: Continues into development, typically reaching 405-415°F. A light caramel color appears on the surface. Medium roasts balance origin flavor with roasted character, offering fuller body than light roast with mellowed acidity and added sweetness. This is the most common roast level in the U.S. specialty coffee market.
Dark roast: Pushed past the second crack, typically reaching 420-430°F or beyond. The surface is visibly oily and nearly black. Dark roasts emphasize roasted, smoky, sometimes bitter notes. Origin flavor nearly disappears. These beans work well in espresso because the darker roast and increased oil content help create crema, with less acidity and heavier body.
The choice between light, medium, and dark isn't about quality, it's about preference. A well-executed light roast and a well-executed dark roast are equally skillful.
How to Roast Coffee Beans at Home
Home roasting opens a completely different coffee experience. You control every variable, taste beans at different roast levels, and enjoy roasted coffee at peak freshness.
What You'll Need
- Green coffee beans: Purchase unroasted beans from specialty suppliers. They're shelf-stable for months and cost significantly less than roasted beans.
- Roasting equipment: An air popper (around $30-50), a drum roaster ($150-500+), or a cast iron skillet with a thermometer.
- Thermometer: An infrared or probe thermometer to track internal bean temperature.
- Cooling tray: A colander or mesh strainer for rapid cooling.
- Timer: Track roast duration and crack timing.
- Workspace: A well-ventilated area, as roasting produces chaff and smoke.
Step-by-Step Home Roasting Instructions
Step 1: Measure and prepare your beans [Time: 5 minutes]
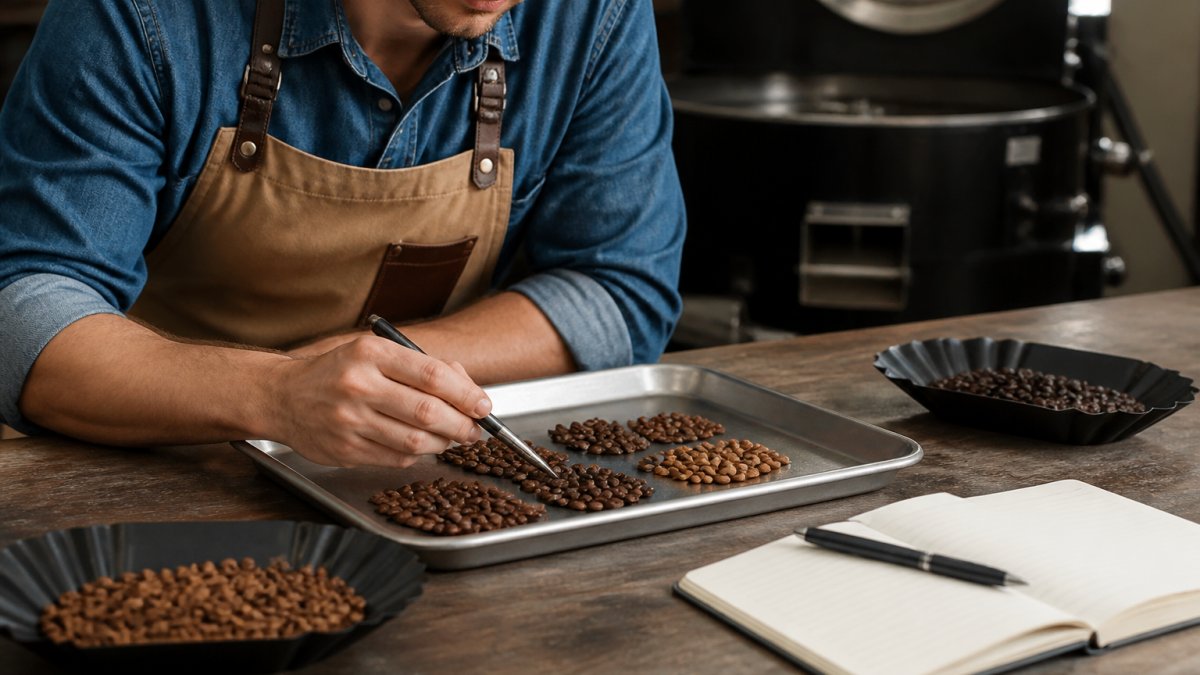
Weigh out 100-200 grams of green beans. Start with a smaller batch for easier learning. Spread them on a tray and remove any debris, broken beans, or stones.
Step 2: Preheat your roaster [Time: 5-10 minutes]
If using an air popper, turn it on empty for a minute to reach operating temperature. If using a drum roaster, heat it to around 350°F. If using a skillet, heat it over medium-high heat until a drop of water sizzles immediately on contact.
Step 3: Add beans and monitor temperature [Time: 12-18 minutes total]
Pour the beans into your roaster and set your timer. Begin tracking internal bean temperature if you have a thermometer. The drying phase will last 4-6 minutes. You'll smell a grassy aroma, this is normal and doesn't smell like coffee yet.
Around the 6-8 minute mark, the browning phase begins. The beans turn tan, then light brown, and the aroma shifts to something more coffee-like. If using an air popper, the beans will pop and jump normally. If using a drum roaster, you'll see the color change gradually.
Step 4: Listen for the first crack [Time: 9-12 minutes in]
A distinct popping or cracking sound signals the first crack, acoustic evidence that the bean's cell structure has ruptured from internal pressure. At this point, you have a light roast if you stop immediately. If you continue, you're entering development.
Step 5: Continue into development or stop [Time: 12-18 minutes total]
For a light roast, stop immediately after first crack. For a medium roast, continue another 1-2 minutes, watching the color deepen. For a dark roast, listen for the second crack and stop shortly after. Keep notes on your first attempt so you can adjust next time.
Step 6: Cool the beans rapidly [Time: 3-5 minutes]
The moment you stop roasting, spread the hot beans on a cooling tray and stir gently to release heat. Rapid cooling stops the roasting process immediately. If you let them sit in the roaster, residual heat will continue darkening the batch beyond your target level.
Step 7: Rest and store [Time: 12+ hours before brewing]
Freshly roasted beans release CO2 gas for 12-24 hours (peer-reviewed research). Wait at least 12 hours (preferably 24) before grinding and brewing. Store cooled beans in an airtight container away from direct light. They'll peak in flavor 3-7 days after roasting and remain good for 2-3 weeks.
Home Roasting Safety Essentials
Roasting involves heat, smoke, and chaff. A few precautions keep the process safe and pleasant.
Ventilation is non-negotiable. Roasting produces smoke and chaff particles. Roast near a window, use an exhaust fan, or roast outdoors if possible.
Keep a fire extinguisher nearby. While home roasting with proper equipment is safe, a Class B fire extinguisher is appropriate. Never use water on a roaster fire.
Protect your hands and face. Hot beans and chaff can cause minor burns. Wear an apron and consider safety glasses.
Monitor equipment temperature. Air poppers have built-in safety limits. Drum roasters and skillets don't. If your equipment gets too hot, stop and let it cool.
Dispose of chaff properly. The papery skin that flakes off is flammable when hot. Collect it in a metal container and let it cool completely before disposal.
Best Coffee Beans for Home Brewing
Not all green beans are equal. Bean origin, altitude, processing method, and harvest date all influence how they roast and taste.
Single-origin beans come from one specific country or region. Ethiopian beans often taste floral or fruity. Brazilian beans tend toward chocolate and nutty notes. Kenyan beans frequently show berry characteristics. Single-origin beans let you taste terroir and are ideal for light roasts where origin flavor shines.
Blends combine beans from multiple origins to balance brightness and body. They're forgiving and work well for medium and dark roasts.
Altitude matters. Higher-altitude beans (above 4,000 feet) develop slower, retain more acidity, and often taste more complex. If you're new to home roasting, start with higher-altitude beans, whose slower development gives you more time to react and adjust.
Freshness of green beans affects roasting. Beans harvested recently (within the last 6 months) roast more predictably than older stock. Check the harvest date when ordering.
For home roasting, buy from specialty green coffee suppliers who cater to home roasters. Third Space Coffee's sourcing reflects this same commitment to quality, selecting beans specifically for how they perform in roasting equipment and what flavors they'll deliver.
Common Home Roasting Mistakes to Avoid
Most home roasting failures fall into predictable categories.
Uneven roasting. Beans at the bottom of your roaster heat differently than those at the top. Air poppers naturally stir beans. Drum roasters require occasional stirring. Skillets demand constant stirring. If roasts come out with some beans light and others dark, you need more agitation or lower heat.
Stopping at the wrong moment. Roast level is determined by when you stop, not by time. Watch for color and listen for acoustic cues. Time is a guide, not a rule.
Insufficient cooling. Beans that aren't cooled rapidly continue roasting from residual heat. Spread hot beans on a tray immediately and stir to release heat.
Not resting the beans. Brewing beans within 12 hours of roasting tastes flat and sour because CO2 hasn't fully escaped. Wait at least 12 hours.
Ignoring your notes. Write down the ambient temperature, time to first crack, total roast time, and how the final cup tasted. Without notes, you're starting from scratch every batch.
Why Fresh Roasted Coffee Matters
The moment beans are roasted, they begin to stale. Volatile aromatic compounds escape into the air and oxidize. Within two weeks, a roasted bean has lost a noticeable amount of these compounds. Within a month, it tastes significantly duller than it did on day one.
Commercial coffee shops sourcing from distant roasters are serving beans that are often 1-2 weeks old by arrival. Grocery store beans can be months old. The flavor difference between a bean roasted yesterday and one roasted three weeks ago is dramatic, the fresh bean is brighter, more aromatic, and more complex.
This is why in-house roasting at Third Space Coffee delivers a noticeably superior cup. When you order coffee here, the beans were roasted days or even hours before you brew them. You're tasting the coffee at its peak, before oxidation has degraded the flavor.
Home roasting gives you this same advantage. Your first cup from a batch you roasted yesterday will taste brighter and more alive than any commercial coffee you've bought. The coffee roasting process explained simply comes down to this: roasting is chemistry and timing. Master the stages, understand your equipment's behavior, and you'll produce coffee that rivals what specialty roasters charge premium prices for.
Frequently Asked Questions
Q: What is the first crack in coffee roasting?
A: The first crack is an audible popping sound that occurs when internal moisture in the coffee bean converts to steam and causes the bean to expand and split. This marks the transition from the drying phase to the browning phase and typically happens at around 350-400°F. Reaching first crack is essential, it signals that the maillard reaction has begun and the beans are developing flavor compounds. Many home roasters use the first crack as a timing reference point.
Q: How long should roasted coffee beans cool before brewing?
A: After roasting, cool your beans for at least 12-24 hours before brewing. During this degassing period, the beans release carbon dioxide built up during roasting. Brewing too soon results in uneven extraction and bitter, sour flavors. Cooling also allows the roast profile to stabilize. For optimal flavor, some coffee enthusiasts wait up to 48 hours, though beans remain fresh and usable after 12 hours if you're eager to try them.
Q: What is the difference between light, medium, and dark roasts?
A: Light roasts are pulled at or just after first crack, preserving origin flavors and acidity. Medium roasts reach mid-development, balancing origin characteristics with roast flavors. Dark roasts extend into or past second crack, emphasizing bold, smoky, bitter notes and reducing acidity. The roast level you choose depends on your taste preference and the bean's origin, African beans often shine as light roasts, while darker roasts suit earthy, chocolatey profiles.
Q: Can I roast coffee beans in a home oven?
A: Yes, you can roast coffee in a standard home oven using a baking sheet, though it requires careful monitoring and offers less control than dedicated equipment. Preheat to 450°F, spread green beans in a single layer, and roast for 15-20 minutes, stirring every few minutes. Listen for first crack to gauge doneness. Home ovens distribute heat unevenly, so you may get inconsistent roasts. For better results, consider a popcorn air popper or small drum roaster, which provide more precise temperature control and more even heat transfer.
Fresh roasted coffee transforms how you experience your daily brew. Whether you're roasting at home or seeking out a roaster committed to freshness, the difference is unmistakable. At Third Space Coffee, we roast our beans in-house specifically to deliver that peak-freshness experience to our community. Visit us to taste what freshly roasted coffee actually tastes like, or reach out to learn more about our roasting approach and sourcing philosophy.
This article was written using GrandRanker