 how-to
Troubleshooting Uneven Coffee Bean Roasts: 7 Fixes
Table of Contents
- Why Your Beans Look Patchy: What an Uneven Roast Actually Is
- Common Causes of Uneven Coffee Roasts
- Cosmetic Color Variation vs. a Real Roast Defect
- A Step-by-Step Diagnostic Workflow for Uneven Coffee Roasts
- How to Fix Uneven Coffee Roasting: Adjustments That Work
- Home Coffee Roasting Troubleshooting by Roaster Type
- Green Bean Preparation and Lot Variation
- Coffee Bean Resting Time After Roasting
- Frequently Asked Questions
Last Updated: October 17, 2026
Why Your Beans Look Patchy: What an Uneven Roast Actually Is
Patchy color is not always a problem. Some variation is normal, especially with natural-process beans or mixed screen sizes. The real question is whether the unevenness shows up in the cup.
Below, we'll show you how to tell the difference and what to adjust. The core issue: not every bean gets the same amount of heat at the same time.
Common Causes of Uneven Coffee Roasts
The causes of uneven coffee roasts usually trace back to three systems: heat, airflow, and movement. When any one is out of balance, some beans roast faster than others. Anything that blocks, speeds up, or slows down equal access to heat creates patchy results. Here are the usual suspects:
- Poor heat distribution across the drum
- Weak or uneven airflow
- Too large a batch for the drum
- Too little bean movement
- Green beans of mixed density or size
Most home roasters fix the wrong one first. We'll walk through each so you can target the actual culprit.
Heat Distribution and Heat Application
Heat distribution is how evenly your roaster spreads heat across the drum and bean mass. Heat application is how that heat reaches the beans, through contact, convection, or radiation. A drum roaster mainly uses contact heat from the metal. If the drum has hot and cool zones, beans against a hot spot darken first, causing scorching and tipping. The fix starts with warm-up: a drum that hasn't fully heated gives uneven heat application from the first minute.
Airflow, Convection, and Bean Movement
Airflow does two jobs: it moves heat through the drum and pushes moisture and smoke out. Weak airflow means heat sits in pockets; strong, steady convection spreads heat more evenly. Bean movement matters just as much, if beans sit still, the ones touching the drum scorch while the ones in the middle bake. A simple check: watch the bean mass through the sight glass. Tumbling and rolling is good; clumping or sitting flat is a problem.
Batch Size, Drum Speed, and Roaster Mechanics
An overloaded drum is one of the most common causes of uneven coffee roasts. Too many beans means less room to move and less airflow between them, so the batch roasts unevenly no matter how good your heat settings are. Drum speed, measured in RPM, controls how fast beans turn over: too slow and they sit against the metal, too fast and they centrifuge against the drum wall and stop mixing. Every roaster has a sweet spot.
| Cause | Likely Symptom | First Fix |
|---|---|---|
| Poor heat distribution | Scorching, tipping on one side | Longer warm-up, check burner |
| Weak airflow | Flat, baked flavor, slow roast | Increase airflow, clean chaff |
| Overloaded drum | Patchy color across batch | Reduce batch size |
| Low drum speed | Uneven contact, hot spots | Adjust RPM to sweet spot |
| Mixed bean density | Color variation bean to bean | Sort or use single lot |
Cosmetic Color Variation vs. a Real Roast Defect
Not all color variation is a defect. Cosmetic variation is surface color difference that does not affect flavor; a real roast defect changes how the coffee tastes. Cup the coffee to tell them apart: sweet, balanced, and clean means the patchiness is likely cosmetic; baked, ashy, or grassy means a genuine defect like underdevelopment or scorching. Some variation is expected, natural-process beans carry fruit residue that browns at different rates, and peaberry beans and mixed screen sizes roast at different speeds.
The real problems show up as specific defects:
- Scorching: dark burn marks from contact with hot metal
- Tipping: burnt bean tips from too much early heat
- Baking: dull, flat flavor from a slow, low-heat roast
- Underdevelopment: grassy, sour taste from stopping too early
A Step-by-Step Diagnostic Workflow for Uneven Coffee Roasts
This is the workflow we recommend for troubleshooting uneven coffee bean roasts. Work through it in order, changing only one variable at a time.
- Cup the batch first. Decide if the unevenness is cosmetic or a real defect. Taste before you touch settings.
- Log the roast. Record batch size, charge temp, burner setting, airflow, drum speed, and first crack timing.
- Inspect the green beans. Check for mixed screen sizes, density differences, and processing variation.
- Check bean movement. Watch the sight glass. Confirm beans tumble, not clump or sit.
- Test batch size. Drop to 75% of your normal load and roast again.
- Adjust one variable. Change airflow or drum speed, not both.
- Re-roast and compare. Cup side by side against the original batch.
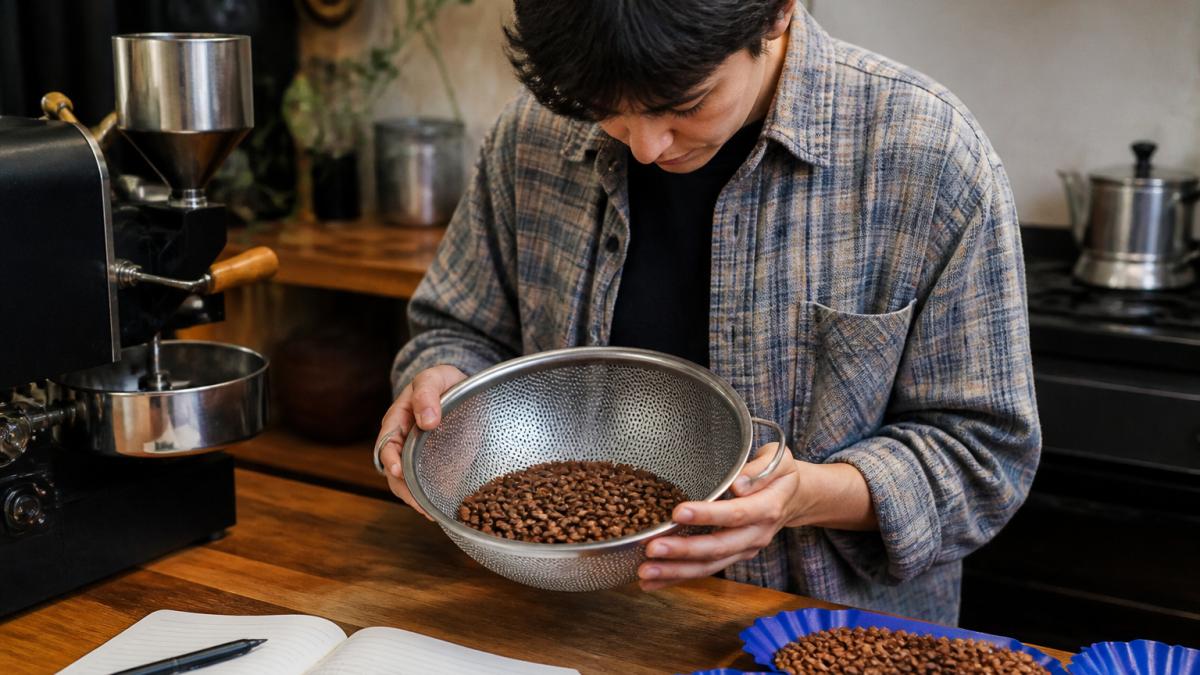
The key is control. Change one thing, log it, and compare. That turns guesswork into a repeatable process.
How to Fix Uneven Coffee Roasting: Adjustments That Work
The fixes for uneven coffee roasting fall into a short list, and most batches improve after one or two changes. Start with batch size: an overloaded drum is the easiest problem to fix and the most common, and dropping to 75% load often solves patchiness on its own.
- Reduce batch size first
- Increase airflow in small steps
- Tune drum speed to your roaster
- Extend warm-up time
- Sort green beans by size if needed
For deeper background on roast development and first crack, the Specialty Coffee Association's roasting guidance is a solid reference.
Home Coffee Roasting Troubleshooting by Roaster Type
Home coffee roasting troubleshooting depends heavily on your equipment. A drum roaster, a fluid-bed roaster, and a pan all fail in different ways, and the same fix can help one machine and hurt another. Match your fix to your machine before changing your roast profile.
Drum Roaster Fixes
Drum roasters rely on contact heat from the metal plus some convection from airflow. That makes bean movement and drum speed the first things to check.
- Scorching or tipping on one side: extend warm-up until the drum is fully heated, then lower charge temperature. A cold drum forces you to apply too much heat early, which burns bean tips before the center develops.
- Patchy color across the batch: reduce load to about 75% of capacity and confirm the drum turns freely by hand when cold. A worn belt or weak motor reduces tumbling even when the drum still spins.
- Baked, flat flavor: clean chaff from the drum and exhaust path. Chaff buildup blocks heat transfer and traps moisture, so the batch stalls instead of developing.
- Hot spots near the burner side: rotate the roaster's position or check that the burner flame is even. Many home drum roasters have a hotter side that shows up as one dark edge on the bean mass.
Drum roasters usually fail first at movement, not heat. Watch the sight glass: beans should tumble and roll, not clump or ride the wall.
Fluid-Bed and Pan Roasting Fixes
Fluid-bed roasters use hot air to keep beans moving, so airflow is everything. If beans roast unevenly, check that the air is strong enough to keep them circulating freely; weak airflow lets beans settle against hot surfaces, producing scorching and patchy color. Clean the chamber and check the blower intake for chaff or dust before adjusting temperature. For pan roasting, stirring is the whole game: stir constantly over even heat, use a heavy-based pan, preheat it before adding beans, and never let beans sit still against the pan bottom, that is scorching them.
| Roaster Type | Main Risk | First Check | Best Fix |
|---|---|---|---|
| Drum roaster | Scorching, hot spots | Drum turns freely, chaff clear | Reduce load, extend warm-up, tune RPM |
| Fluid-bed roaster | Weak circulation | Airflow strength, blower intake | Increase airflow, clean chamber |
| Pan roasting | Uneven stirring | Beans sitting against pan | Stir constantly, use heavy pan, preheat |
Green Bean Preparation and Lot Variation
Green bean quality sets the ceiling for roast consistency. Mixed screen sizes, density differences, and uneven moisture content all cause color variation, no matter how good your roaster is, so the fix starts before the beans hit the drum.
Here is a pre-roast preparation workflow that addresses the gap most home roasters skip:
- Check moisture and density. Squeeze a handful of green beans: soft or spongy beans likely carry higher moisture and roast slower, while hard, dense beans roast faster. If you have a moisture meter, aim for a consistent reading across the lot, since outliers roast differently.
- Sort by screen size. Use a simple sieve or screen tray to separate small, medium, and large beans. Roast each size separately, or accept that the smallest beans will darken first.
- Remove defects. Pull out broken beans, black beans, and foreign matter before roasting. Defective beans brown unevenly and can scorch, and they affect cup flavor even in small amounts.
- Keep lots separate. If you blend, roast each lot separately and combine after. Blending green beans of different density or processing before roasting guarantees patchy color.
- Record lot details. Note variety, processing method, screen size, and moisture reading in your roast log. When a batch roasts unevenly, you can check whether the cause was the lot rather than your settings.
Start with a single lot and single screen size, and sort out obvious defects before roasting, the step most home roasters skip, and it costs them consistency.
Coffee Bean Resting Time After Roasting
Coffee bean resting time after roasting affects how you judge a batch.
For guidance on freshness and storage, the USDA food storage guidance offers general food safety context, and the National Coffee Association's consumer resources covers brew and storage basics.
Uneven color can make you doubt a whole batch of beans. But most patchiness comes down to a few fixable causes: batch size, airflow, movement, and heat.
At Third Space Coffee, we roast our beans in-house, so we know how much control matters.
Frequently Asked Questions
Why do my coffee beans roast unevenly?
Uneven coffee roasts usually come down to heat distribution, airflow, and bean movement. If the drum is overloaded, beans clump together and some get scorched while others stay pale. Low airflow traps moisture and heat, and a drum spinning too slowly leaves beans sitting against the hot metal. Green bean size and density differences also play a role, since small and large beans absorb heat at different rates. Fixing one variable at a time, starting with batch size, solves most cases.
How can I tell if a coffee roast is uneven or just cosmetic?
Look at the cup, not just the color. Some color variation is normal, especially in single-origin coffee with natural screen size differences. A genuine roast defect shows up as scorching, tipping, or baked flavors in the cup. If the beans look patchy but taste sweet and balanced, it is likely cosmetic. If you taste ash, char, or a flat baked note, the unevenness is real and worth fixing through airflow and batch size adjustments.
How do I fix uneven coffee bean roasts at home?
Start by reducing batch size to about 75 percent of the roaster's rated capacity, then increase airflow and confirm the drum is spinning at the recommended RPM. Stir manually if you are pan roasting. Log every roast with charge weight, burner setting, and first crack timing so you can compare batches. Change one variable per roast. Most home coffee roasting troubleshooting comes down to overloaded drums and weak agitation, and both are easy to correct.
How long should you let coffee beans sit after roasting?
Coffee bean resting time after roasting depends on the brew method. Rest them in a sealed container with a one-way valve at room temperature, away from light and moisture, and avoid grinding until you are ready to brew.