
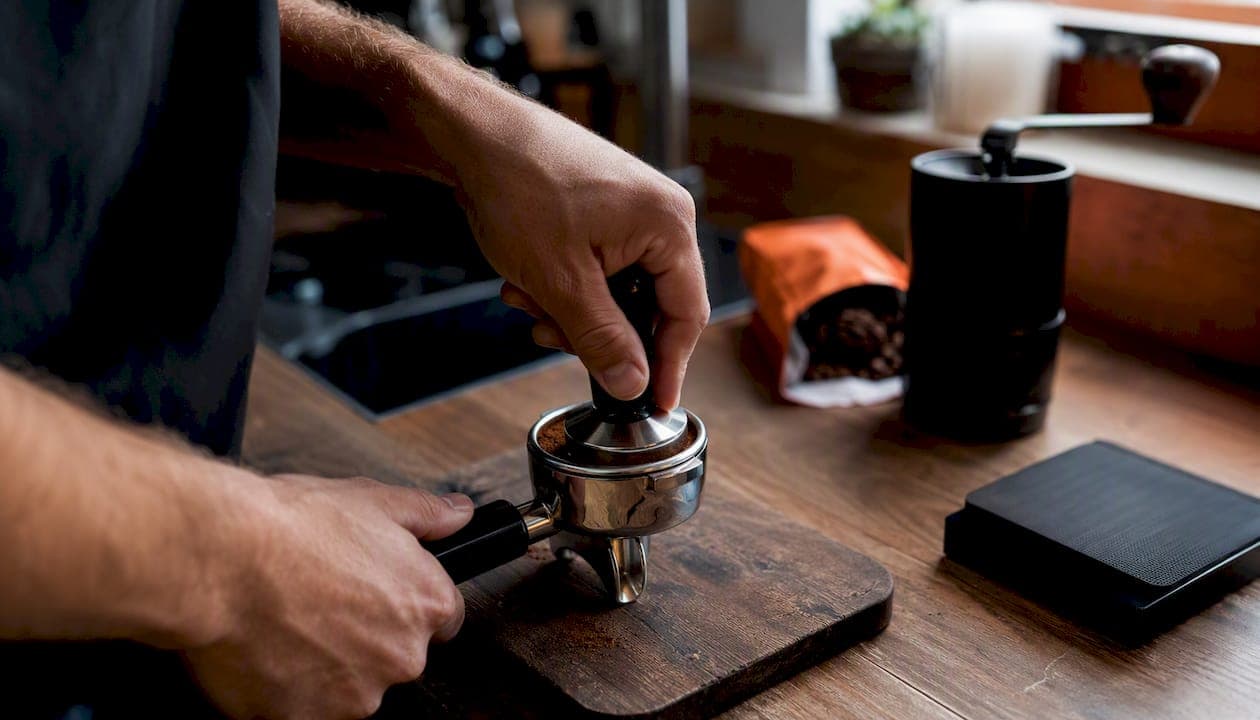
Your target window is generally around a half minute, measured from the moment you press the button to the moment you stop the shot, for a standard 1:2 double. That's intended as a guideline, not a strict rule. If you're pulling 18 grams of a medium-roast blend and aiming for 36 grams out, a shot tasting balanced within a typical timing range is generally considered good, regardless of stopwatch precision.
Here's the baseline recipe worth memorizing:
- Dose: 18g ground coffee
- Yield: 36g liquid espresso (1:2 ratio)
- Time: 25–30 seconds, press-to-pour
"Press-to-pour" means the clock starts when you hit the brew button, not when coffee first appears in the cup. That distinction matters more than most beginners realize, and it's the first thing to get straight before you touch your grinder.
Key Takeaways
Extraction time works best as a diagnostic signal read alongside taste and weighed yield, not as a fixed target to hit for its own sake.
| Point | Details |
|---|---|
| Start with 25–30 seconds | Use this as your baseline window for an 18g to 36g double, press-to-pour timing. |
| Weigh your yield | A kitchen scale catches inconsistencies that a stopwatch alone will miss. |
| Fix puck prep first | Even distribution and a level tamp solve channeling before any grind change will. |
| Adjust grind primarily | Change grind in small steps before touching dose or tamp pressure. |
| Match taste to cause | Sour means under-extracted, bitter means over-extracted, both together usually means channeling. |
Table of Contents
- What Does the 25-30 Second Extraction Rule Actually Mean?
- How Do You Measure Espresso Shot Time Correctly?
- How Do You Dial In Espresso Using Time as a Signal?
- How Does Puck Prep Change Your Extraction Time?
- Why Is My Espresso Sour or Bitter? Troubleshooting by Taste
- Do Single Shots, Doubles, and Basket Types Change the Time?
- A Simple Test Protocol for Refining Your Shot Timing
- Putting a Well-Timed Home Espresso Routine Together
- The Real Lesson Behind Extraction Time
- Frequently Asked Questions
- Sources
What Does the 25-30 Second Extraction Rule Actually Mean?
The 25 to 30 second window isn't an arbitrary number someone picked because it sounded reasonable. It roughly maps to how flavor compounds dissolve out of coffee grounds over time: the first several seconds pull mostly acids, the middle stretch brings out sugars and aromatic oils, and anything past 30 seconds starts dragging out bitter, papery compounds along with everything good. That's why a shot that's technically "in range" can still taste flat or sharp. Time approximates flavor extraction, but it doesn't guarantee it.
Treat this window as a starting recipe, not a universal law. Roast level and your chosen ratio shift it considerably:
- Light roasts often require longer contact time due to denser beans, which may extend shot durations for optimal sweetness
- Dark roasts tend to extract faster due to their porous nature and may benefit from shorter shot times to avoid bitterness
- Short, concentrated shots (ristretto) are generally pulled for less time
- Extended shots (lungo) involve longer extraction to yield more volume, often with a more bitter profile
A home barista guide on shot timing puts the standard 18g to 36g pour at roughly 25 to 32 seconds, and notes that this window shifts as soon as you change roast or ratio. The real lesson: time is an output of your dose, grind, and yield working together, not a target you chase independently. If your taste is off but your clock reads "correct," the clock is lying to you.
How Do You Measure Espresso Shot Time Correctly?
Two clocks exist in the espresso world, and mixing them up is one of the most common reasons home baristas get confused comparing notes with friends or online forums.
Press-to-pour starts your timer the instant you press the brew button, capturing pre-infusion and all. First-drop starts only once liquid actually appears in the cup, skipping the pre-infusion phase entirely. According to one detailed breakdown of espresso shot timing, press-to-pour tends to be the more repeatable method on consumer machines because pre-infusion behavior varies a lot between models, while first-drop timing shows up more in professional training environments where baristas are comparing results across different commercial machines with more standardized pre-infusion.
For home use, press-to-pour is simpler and more consistent. Here's the actual procedure:
- Prep your puck (dose, distribute, tamp) before you touch the timer at all.
- Start your timer the moment you press the extraction button, not when you see coffee.
- Watch for first drop as a sanity check. Anywhere from 5 to 10 seconds after pressing is typical; much faster suggests a grind that's too coarse.
- Stop the shot at your target yield, weighed on a scale, not at a fixed time.
- Note the final time for your records.
That fourth step is the one most people skip, and it's the one that matters most. Weighing your yield on a small kitchen scale beats eyeballing the cup every time. Two shots that both hit "30 seconds" can produce 32g and 40g of liquid depending on grind and flow rate, and those two shots will taste completely different. Time tells you how you got there; weight tells you what you actually made. Use both, but if you have to pick one to trust, pick the scale.
How Do You Dial In Espresso Using Time as a Signal?
Dialing in is really just a controlled experiment: change one thing, taste the result, adjust again. Extraction time is your feedback signal, not your goal.
- Set your baseline. Start with 18g dose, double basket, a mid-range grind setting, and press-to-pour timing.
- Pull a shot and record grind setting, time, yield, and taste.
- Adjust grind first, since it's the single biggest lever for shot time. Move in small increments, a quarter to half turn on most grinders.
- Read the result:
- Shot pulls too fast (under 25 seconds, thin and sour) → grind finer, or increase dose slightly
- Shot pulls too slow (over 30 seconds, harsh and bitter) → grind coarser, or check your tamp pressure for over-compaction
- Repeat, changing only one variable per test. If grind adjustments alone aren't fixing the taste, then experiment with dose or yield next, not both at once.
- Confirm your setting by pulling 3 to 5 shots in a row. If they land within a couple seconds of each other and taste consistent, you've found your setting for that bag of beans.
Grind size genuinely is the primary control here. Dose and tamp pressure matter, but they're secondary adjustments once grind is roughly right, according to guidance on dialing in grind settings for home brewing.
One thing worth flagging: your "final" setting isn't permanent. Beans change as they age past their roast date, humidity shifts your grinder's output day to day, and a new bag from a different roast batch can need a full re-dial. Treat every new bag as a reason to check, not necessarily overhaul, your settings.
Pro Tip: Keep a small notebook or phone note with your grind setting, dose, and time for every bag of beans you buy. When you open a new bag from the same roaster, you'll have a starting point instead of dialing in from zero.
How Does Puck Prep Change Your Extraction Time?
Pre-infusion, the gentle low-pressure soak before full pump pressure kicks in, changes how your shot time reads without changing your grind at all. Machines with built-in pre-infusion effectively add a few seconds of gentle wetting before extraction really begins, which is part of why press-to-pour times often run a touch longer than first-drop times on the same machine. Lighter roasts tend to benefit from a longer pre-infusion window since denser, less-roasted beans need more time to absorb water evenly before pressure builds.
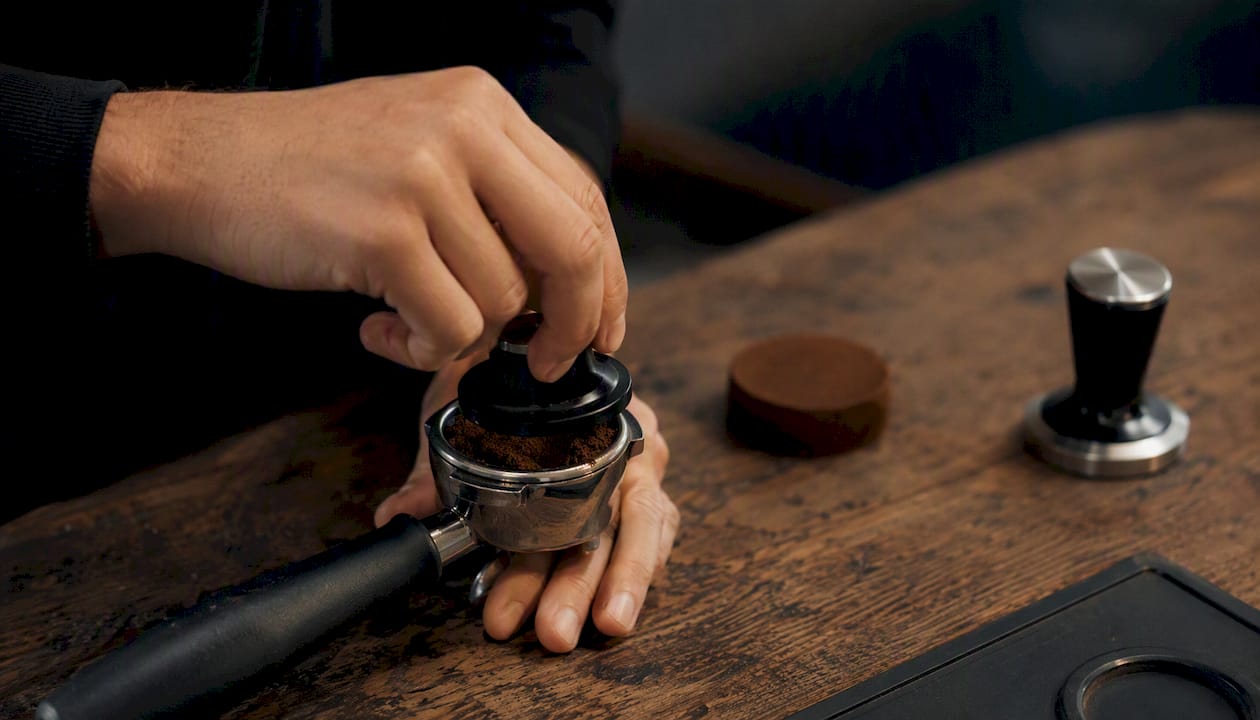
Before you touch your grinder to fix a timing problem, check your puck prep. A quick checklist:
- Distribute grounds evenly before tamping, using a finger swirl or a distribution tool.
- Use WDT (Weiss Distribution Technique), stirring grounds with a fine needle tool to break up clumps before tamping.
- Tamp level, applying even pressure straight down rather than at an angle.
- Check your basket for dead spots where grounds pile unevenly against the wall.
Uneven pucks create channels where water rushes through the path of least resistance instead of flowing evenly through the whole bed of coffee. That's channeling, and it's sneaky because the total shot time can look completely normal while the flavor is a mess.
Pro Tip: If your shot tastes both sour and bitter at the same time, in the same sip, stop adjusting your grinder. That combination is the classic signature of channeling, and grind changes won't fix an unevenly packed puck. Fix your distribution and tamp first, then reassess.
Why Is My Espresso Sour or Bitter? Troubleshooting by Taste
Your tongue is a better diagnostic tool than your stopwatch, and matching what you taste to what you see gives you a faster path to a fix.
- Sour, sharp, thin, watery: under-extraction. Sourness hits immediately on the sip, according to a breakdown of sour versus bitter espresso, and usually means the water moved through the grounds too fast. Grind finer, increase dose slightly, or extend time.
- Bitter, harsh, ashy, dry aftertaste: over-extraction. Bitterness tends to arrive later in the sip rather than immediately, often pointing to a grind that's too fine, too much yield, or brew water that's running hot. Grind coarser or shorten your pour.
- Sour and bitter together in the same sip: almost always channeling, not a grind problem at all. Fix distribution and tamp before changing anything else.
Visual cues at the machine back this up. If your first drop appears very quickly, it suggests the grind may be too coarse. If the first flow takes a long time to start, it indicates the grind might be too fine or the dose is too high. Shots that flow unevenly or with spurts indicate channeling occurring during extraction.
Equipment matters too, and it's easy to overlook: a stable hot-water supply with reliable commercial water boiler equipment helps maintain temperature consistency for better shots.
- Flush the group head before each shot to stabilize brew temperature.
- Clean your grinder burrs regularly, since stale grounds and oil buildup change particle size distribution over time.
- Check burr wear if your grind setting has drifted noticeably from where it used to sit for the same roast.
A shot that tastes sour and bitter at once is rarely a grind problem. It's almost always uneven water flow finding the easiest path through the puck, and no amount of grinder fiddling fixes a distribution issue.
Do Single Shots, Doubles, and Basket Types Change the Time?
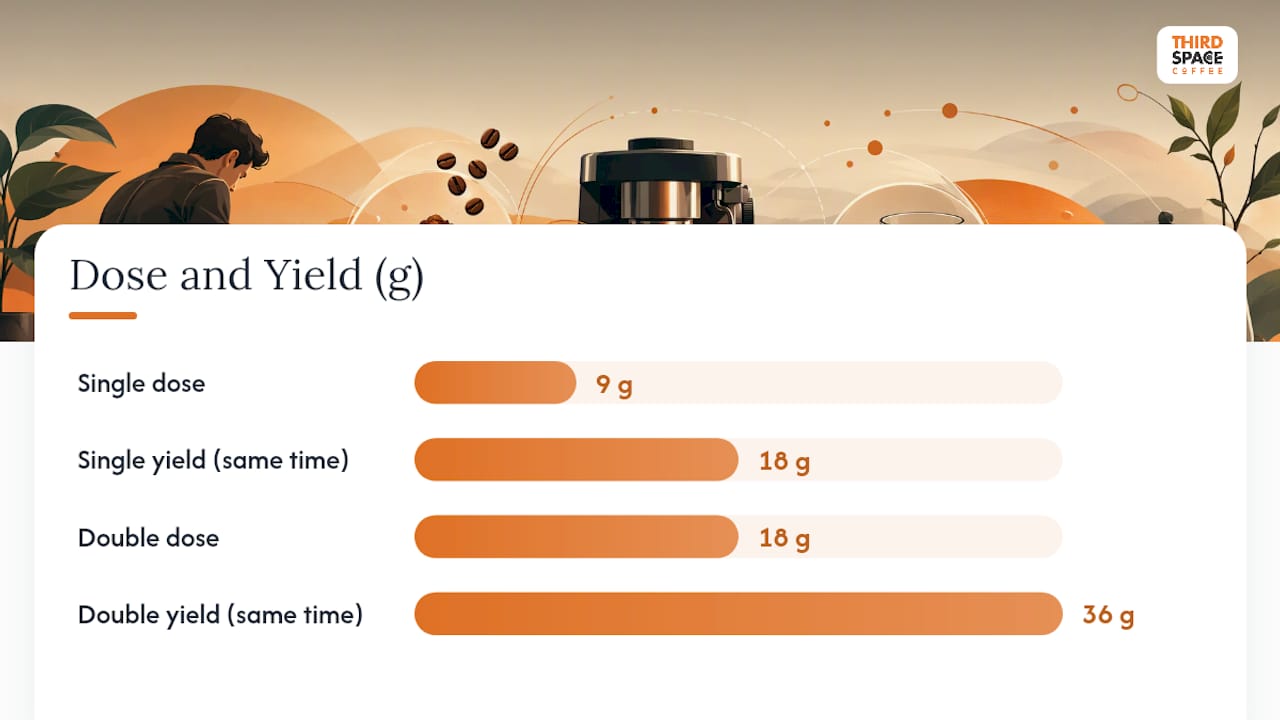
Single and double baskets generally target the same time window, roughly 25 to 30 seconds, since the ratio of coffee to water stays similar; what changes is the yield, not the clock. A single shot with 9g of coffee might yield 18g of espresso in about the same time it takes a double basket loaded with 18g to yield 36g.
Pressurized baskets, common on many entry-level machines, work differently. They force water through a small hole regardless of your grind setting, which means timing tells you far less about your actual extraction. A pressurized basket can produce a "normal-looking" 27 second shot with almost any grind size, so it's a weaker diagnostic tool than a standard, non-pressurized basket.
For style variations:
- Ristretto: stop around 15–20 seconds or roughly a 1:1 ratio, prioritizing concentration
- Lungo: extend past 35 seconds or roughly a 1:2.5 to 1:3 ratio, accepting more bitterness for volume
In both cases, stop based on your target yield on the scale, not strictly by the clock.
A Simple Test Protocol for Refining Your Shot Timing
Three steps, repeated patiently, beat random tweaking every time:
- Set a baseline and pull one shot, recording every variable.
- Change one variable, usually grind, and pull three shots at that new setting to check for consistency, not just one.
- Compare taste and time across your notes before deciding whether to keep adjusting or lock it in.
A simple log, kept in a notebook or your phone, helps track extraction patterns over time as beans age and settings drift.
Stop testing once you get three consecutive shots landing within a couple seconds of each other with taste you're happy with. That's a locked-in setting, at least until the bag runs low or a new one arrives.
Putting a Well-Timed Home Espresso Routine Together
Reliable espresso at home starts with beans you trust. Third Space Coffee roasts whole bean coffee in-house in Colorado Springs, which gives you a consistent, fresh baseline to dial in against, instead of guessing how a mystery bag from a grocery shelf behaves. If dialing in at home still feels like more trial and error than you want on a given morning, stop by the shop and order a specialty espresso drink made by someone who pulls dozens of shots a day, or grab an Americano to taste what a properly balanced shot should taste like before you try to replicate it at home.
The Real Lesson Behind Extraction Time
Most guides treat 25 to 30 seconds like a rule to enforce, and that's backwards. Time is downstream of everything else you do to the puck: your grind, your distribution, your tamp, your dose. Chase those variables and let the clock report back to you, not the other way around.
The biggest gap I see in how people talk about this topic is that they fixate on the stopwatch and ignore the tongue. A 26 second shot that tastes sour and a 31 second shot that tastes balanced should teach you the same lesson: taste wins, every time, over a number on a timer. If your shot tastes right, it's right for that coffee, that grinder, and that day, regardless of what the clock says.
Where I'd push back hardest on conventional advice: too many beginners chase grind adjustments when the real problem is sitting in the portafilter as an unevenly distributed puck. Fix your prep before you touch your grinder. It's the cheaper fix, and it's the one people skip because it feels less technical than turning a dial.
Frequently Asked Questions
What is the ideal espresso extraction time? Most standard double shots, brewed at an 18g to 36g ratio, taste best somewhere between 25 and 30 seconds, measured press-to-pour. Light roasts often need a few seconds longer; dark roasts often taste better a few seconds shorter.
Why is my espresso sour? Sourness almost always signals under-extraction, meaning water moved through the grounds too quickly. Try a finer grind, a slightly higher dose, or a longer pour, and check that your puck is evenly distributed first.
Should I time my espresso from the first drop or from pressing the button? Press-to-pour, timing from the moment you start the pump, is the more practical and repeatable method for most home machines, since it accounts for pre-infusion. First-drop timing is mostly used in professional settings comparing different commercial machines.
Does grind size or dose affect extraction time more? Grind size is the primary lever. Finer grinds slow the flow and extend time; coarser grinds speed it up. Dose and tamp pressure matter but are secondary adjustments once your grind is roughly correct.
What causes a shot to taste sour and bitter at the same time? That combination usually points to channeling, where water finds an uneven path through the puck rather than passing evenly through the whole bed of grounds. Fixing distribution and tamp solves this faster than adjusting grind.
Sources
- Espresso Extraction Time: How Long Should a Shot Take and Why the Clock Lies | Home Espresso Lab
- Why is my espresso sour or bitter? A troubleshooting guide | PUCK YEAH! Blog
- Sour vs Bitter Espresso: The 10-Second Test + Fixes