TL;DR:
- Home coffee roasting transforms green beans into aromatic brews through a process that involves managing time, temperature, and sensory cues at three distinct phases. Recognizing audible first crack and visual cues is essential to producing consistent light, medium, or dark roasts that outperform store-bought options. A focus on sensory awareness, precise logging, and gradual skill development leads to mastery over this craft, regardless of initial equipment choices.
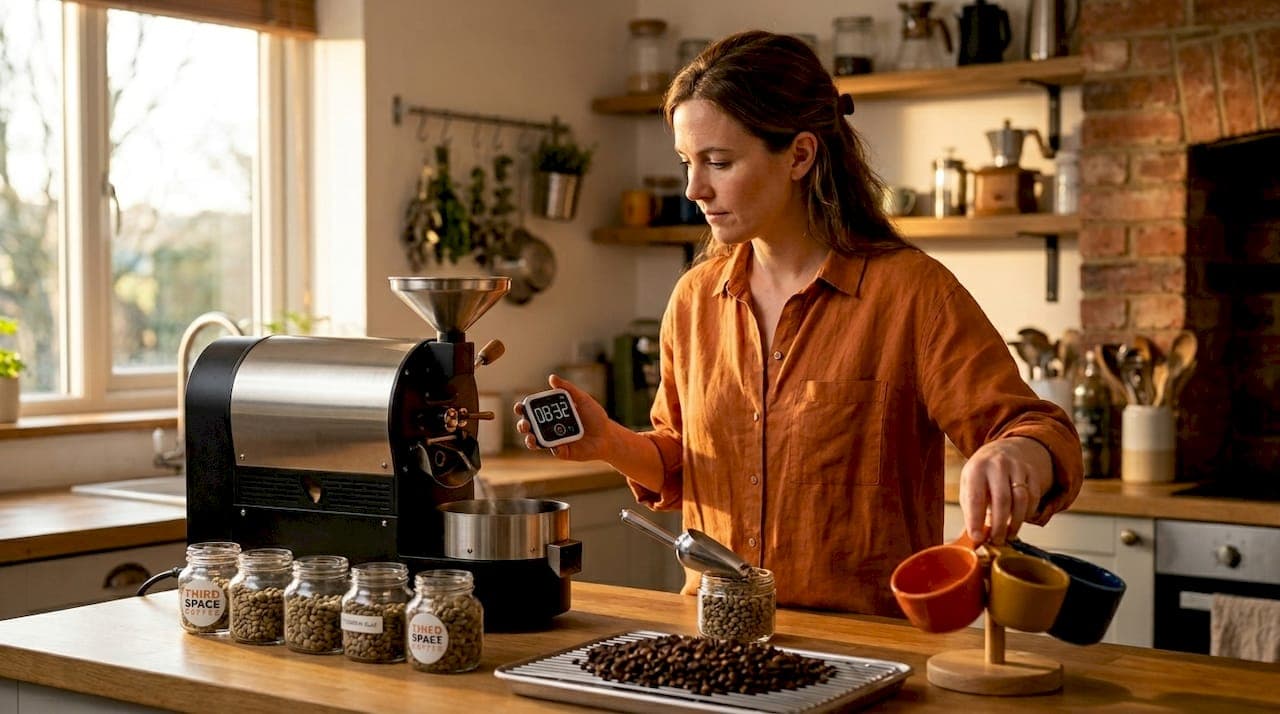
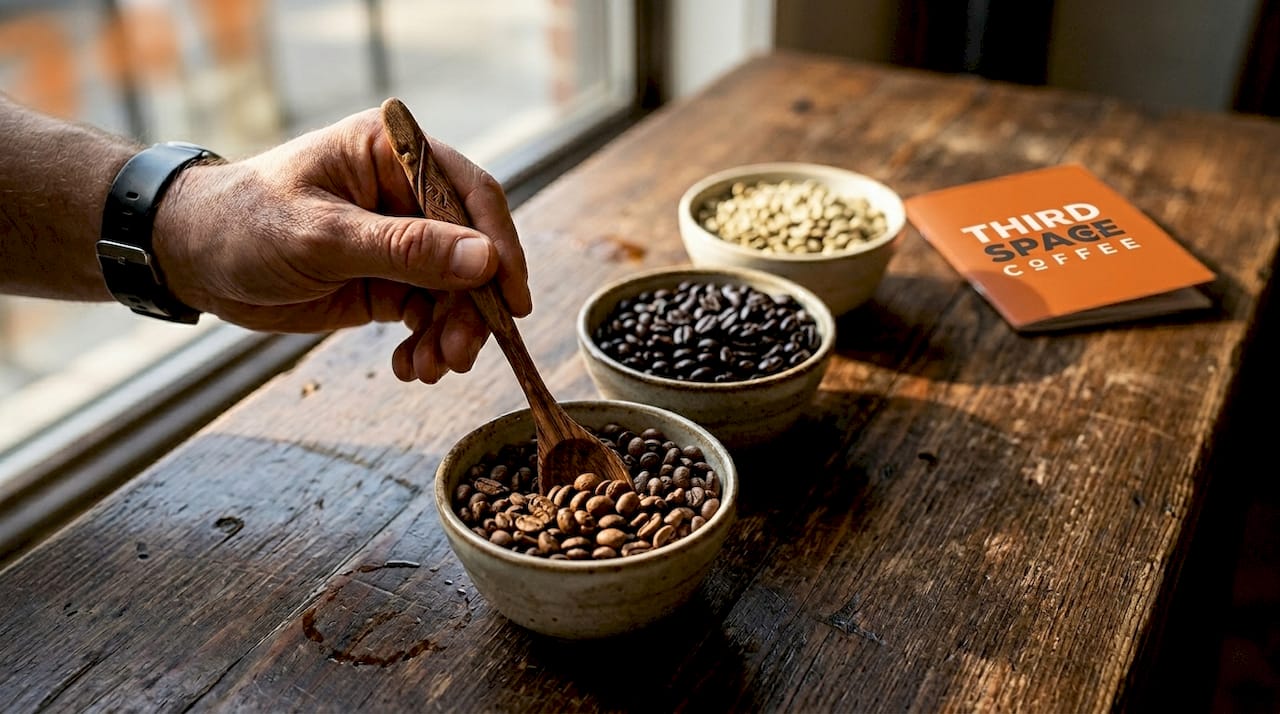
Coffee roasting is the process of transforming raw green beans into the aromatic, flavorful beans you grind and brew, and mastering it at home gives you direct control over every cup. The step by step coffee roasting process centers on managing time, temperature, and sensory cues across three distinct phases. Tools like home popcorn poppers, Fresh Roast air roasters, and green bean suppliers such as Sweet Maria's make this accessible without a commercial setup. Two auditory milestones, first crack and second crack, serve as your primary roast control mechanism. Get these right and you can consistently produce light, medium, or dark roasts that no grocery shelf can match.
What equipment do you need for home coffee roasting?
The right setup determines whether your first roast is a success or a smoke alarm. Most beginners start with a hot air popcorn popper, which costs under $30 and handles 80 to 100g batches reliably. The Fresh Roast SR800 is a purpose-built home roaster that adds temperature control and a chaff collector, making it a strong upgrade for anyone serious about the craft. Stovetop pans and cast iron skillets work in a pinch but require constant stirring and produce uneven results. Modern countertop roasters like the Behmor 1600 or Aillio Bullet ease the learning curve by offering predefined roast profiles while still allowing manual adjustments as your skills grow.
Choosing your workspace
Roasting outdoors or in a well-ventilated space is non-negotiable. Coffee produces significant smoke and chaff during roasting, and both create problems indoors. Chaff is the thin papery skin that separates from beans during the drying phase, and it floats freely in the air before settling on every surface nearby. Smoke from dark roasts is dense enough to trigger fire alarms and leave a residue on kitchen surfaces. A garage with the door open or a covered outdoor patio solves both problems cleanly.
Essential accessories
- Scale: Weigh your green beans before and after roasting. Weight loss percentage is your most reliable roast degree metric.
- Timer: Track total roast time and time to first crack separately.
- Colander: Use two colanders to toss beans between them for rapid cooling after roasting.
- Oven mitts: Beans exit the roaster at temperatures above 200°C.
- Airtight container: Store roasted beans for the 3 to 4 day rest period before brewing.
Pro Tip: Place a box fan behind your roasting area pointing outward. It pulls chaff and smoke away from your face and keeps your auditory environment quiet enough to hear first crack clearly.
| Equipment | Pros | Cons | Batch size |
|---|---|---|---|
| Popcorn popper | Cheap, fast, widely available | No temperature control, small batches | 80 to 100g |
| Fresh Roast SR800 | Chaff collector, adjustable airflow | Higher cost (~$200) | 120 to 300g |
| Stovetop pan | No equipment needed | Uneven heat, requires constant stirring | 100 to 150g |
| Behmor 1600 | Smoke suppression, programmable | Slower roast cycle | 200 to 450g |
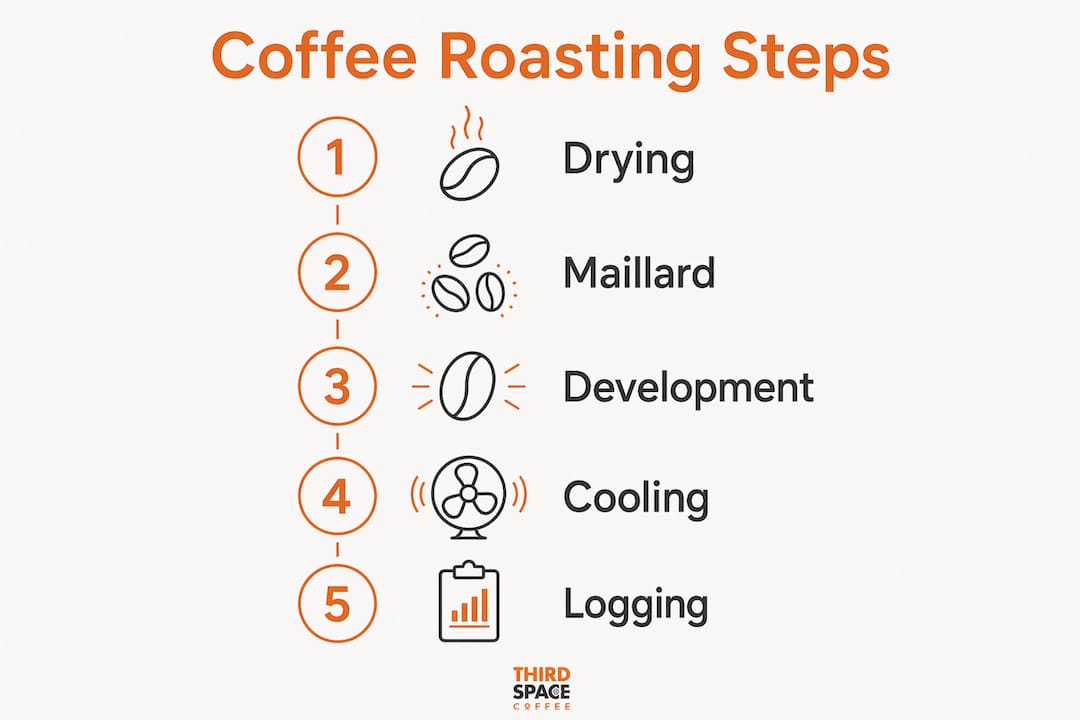
What are the key stages during the roasting process?
Coffee roasting follows three chemically distinct phases, and recognizing each one by smell, sight, and sound is the core skill you are building. Understanding the chemical changes by phase gives you a framework to interpret what your senses are detecting in real time.
The drying phase
The drying phase runs from the moment heat is applied until the beans reach approximately 150°C. Green beans contain 10 to 12% moisture, and this phase drives that moisture out. Beans turn from green to yellow during this stage, and the smell shifts from a raw, wet grass aroma to something closer to hay or fresh bread. No browning occurs yet. This phase is slower than it looks and typically takes 3 to 4 minutes in a popcorn popper.
The Maillard reaction phase
Between roughly 150°C and 196°C, the Maillard reaction begins. This is the same chemical process responsible for browning bread and searing meat. Beans shift from yellow to light brown, and the aroma becomes noticeably richer, moving through toast, then caramel, then chocolate notes. This phase builds the aromatic foundation of your final cup. Rushing through it by applying too much heat produces flat, baked flavors rather than the layered complexity specialty coffee is known for.
The development phase
First crack marks the start of the development phase at approximately 196°C. The sound of first crack resembles popcorn popping, loud and irregular at first, then settling into a steady rhythm. This is the earliest point at which beans are drinkable. Second crack follows later and sounds sharper and more continuous, similar to Rice Krispies in milk. Pulling beans between first and second crack gives you light to medium roasts. Pushing into or past second crack produces dark roasts with bold, smoky flavors and reduced origin character.
"Light roasts maximize acidity and origin character; dark roasts yield bold, smoky flavors and lose origin clarity." — Gota Coffee
| Roasting phase | Temperature range | Sensory cues |
|---|---|---|
| Drying | Green to 150°C | Wet grass smell, yellow color |
| Maillard reaction | 150°C to 196°C | Toast and caramel aroma, light brown color |
| Development | 196°C onward | Cracking sounds, brown to dark brown color |
How to execute a home roasting session step by step
This workflow applies directly to a hot air popcorn popper or Fresh Roast style roaster. Follow it precisely on your first few batches before experimenting with variations.
- Measure your green beans. Weigh out 80 to 100g on a digital scale and note the weight. You will weigh again after roasting.
- Preheat your roaster. Run it empty for 30 seconds before adding beans. This stabilizes the heat environment and prevents uneven early drying.
- Add beans and start your timer. Beans should begin moving immediately in an air roaster. Stationary beans will scorch.
- Monitor the drying phase (minutes 0 to 4). Watch for the color shift from green to yellow. Smell for the transition from raw to hay-like aroma.
- Watch for the Maillard transition (minutes 4 to 5). Beans turn light brown and the aroma becomes noticeably sweet and toasty.
- Listen for first crack (minutes 5 to 7). The first crack timing in a standard air popper falls between 5 and 7 minutes. Stay close and listen carefully.
- Decide your roast level. Pull at 7 to 8 minutes for a light roast, 9 to 10 minutes for medium, or push toward 10 to 12 minutes for dark. The development time between first and second crack significantly affects cup flavor and complexity.
- Cool immediately. Transfer beans to a colander and toss them actively for 2 minutes. Leaving beans in residual heat continues the roast and overshoots your target level.
- Weigh your roasted beans. Calculate weight loss percentage. A medium roast loses 14 to 16% of its original weight. Under 11% means underdeveloped; 17 to 18% indicates a dark roast.
- Rest before brewing. Store beans in an airtight container and wait 3 to 4 days. CO2 off-gassing during this period improves flavor clarity significantly.
Pro Tip: Record your roast weight before and after every single batch. Weight loss percentage is a more reliable roast degree indicator than color, which varies by bean origin and lighting conditions.
How to troubleshoot common home roasting challenges
Even experienced home roasters hit problems. Knowing what causes them and how to fix them separates a one-time experiment from a repeatable craft.
- Missed first crack: A noisy environment or high airflow can mask the sound. Roast in a quieter space and reduce fan speed slightly during the development phase. Higher airflow delays crack timing, so adjusting it also shifts your roast window.
- Uneven roast color: Beans that are not moving freely are roasting unevenly. Check that your popper or roaster is not overloaded. Reduce batch size by 10 to 15g and see if movement improves.
- Bitter or smoky flavor: This almost always means you pushed past second crack or roasted too fast through the Maillard phase. Slow your roast by reducing heat or increasing airflow in the early stages.
- Excessive smoke indoors: Move outside or improve ventilation immediately. Inadequate ventilation is the most common reason home roasters abandon the practice after one or two attempts.
- Flat or baked flavor: This results from roasting too slowly through the Maillard phase. Increase heat slightly between 150°C and 196°C to push through this window more actively.
Keeping a roast log is the single most effective habit for improving consistency. Note your green bean origin, batch weight, preheat time, first crack timing, pull time, and flavor notes after brewing. Tracking these variables across batches reveals patterns that no amount of reading can substitute for.
Pro Tip: Roast the same bean three times in a row before switching origins. Repeating one variable isolates your technique from the bean's natural character, so you learn faster.
Key takeaways
Mastering home coffee roasting requires tracking weight loss, listening for crack sounds, and logging every batch to build repeatable results.
| Point | Details |
|---|---|
| Weight loss as roast metric | Measure before and after every batch; 14 to 16% loss signals a medium roast reliably. |
| First crack is your control point | Listen for popcorn-like sounds at 5 to 7 minutes to time your roast degree decisions. |
| Cool beans immediately | Two minutes of active colander cooling stops the roast and locks in your target flavor. |
| Rest before brewing | Allow 3 to 4 days of off-gassing after roasting for noticeably cleaner cup flavor. |
| Log every roast | Recording time, weight, and sensory notes is the fastest path to consistent results. |
Why sensory awareness beats gear obsession every time
I have watched home roasters spend hundreds of dollars upgrading equipment before they could reliably identify first crack by sound. That is the wrong order of operations. The most important skill in home roasting is not temperature precision or airflow control. It is learning to read what your beans are telling you through smell, color, and sound in real time.
My honest recommendation is to roast the same single-origin bean, something approachable like an Ethiopian Yirgacheffe or a Colombian Huila, at least six times before touching any variables. By the fourth batch, you will start hearing first crack before you expect it. By the sixth, you will smell the transition from Maillard to development before the beans even crack. That sensory calibration is what separates someone who roasts coffee from someone who understands it.
The flavor transformation happening inside each bean is genuinely complex, but your job as a home roaster is not to understand every chemical reaction. Your job is to recognize the signals those reactions produce and respond to them consistently. Note-taking accelerates this process dramatically. A roast log from batch three will tell you more than any guide, including this one.
Start simple, stay consistent, and trust your senses over your thermometer.
— Tanya
Explore freshly roasted coffees from Thirdspacecoffee
Once you have experienced the satisfaction of roasting your own beans, you will want a reliable reference point for what expertly roasted coffee tastes like. Thirdspacecoffee in Colorado Springs roasts whole bean coffees in-house, giving you a direct comparison for your own batches.

Browse their whole bean coffee selection to find single-origin and blended options roasted to specific profiles. If you want to taste the full range before committing to a bag, their specialty drinks menu showcases what those beans produce in skilled hands. Supporting a local Colorado Springs roastery also means you get genuinely fresh coffee, not beans that have been sitting in a warehouse for three months.
FAQ
What does first crack sound like in home roasting?
First crack sounds like popcorn popping, starting irregularly and then settling into a steady rhythm around 5 to 7 minutes into a standard air popper roast. It signals that beans have reached the earliest drinkable roast point.
How do I know what roast level I achieved?
Weigh your beans before and after roasting. Under 11% weight loss means underdeveloped, 11 to 13% is light, 14 to 16% is medium, and 17 to 18% indicates a dark roast. Weight loss percentage is more reliable than color alone.
How long should I wait before brewing home-roasted beans?
Rest roasted beans in an airtight container for 3 to 4 days before brewing. CO2 released during this period dissipates, which noticeably improves flavor clarity and reduces harsh or sour notes in the cup.
Can I roast coffee indoors with a popcorn popper?
Roasting indoors is possible but not recommended without strong ventilation. Smoke and chaff production during roasting can trigger fire alarms and accumulate quickly in enclosed spaces. An outdoor setup or open garage is the safer and more practical choice.
What is the best bean for a beginner home roaster?
Single-origin washed coffees from Colombia or Ethiopia are forgiving and produce clear sensory feedback during roasting. Their defined flavor profiles make it easier to evaluate your roast decisions and understand roasting terminology as you build experience.