 how-to
7 Ways to Measure Coffee Water Temperature Accurately
Last Updated: November 3, 2026
Quick Summary
To measure coffee water temperature accurately, use a fast digital instant-read thermometer with a thin probe and check both the kettle before pouring and the coffee slurry mid-brew. The slurry reading decides flavor, since a kettle at 205°F can produce a slurry closer to 195°F. Calibrate monthly with an ice-water bath and boiling-point check.
- The Specialty Coffee Association recommends brewing water between 195°F and 205°F.
- A fast thermistor or thin thermocouple is the sweet spot for brewing thermometers.
- Calibrate monthly and after any drop or long storage, about five minutes each time.
- Probe the middle of the coffee bed, not the dripper wall, which runs cooler.
- Boiling point drops roughly 1.8°F per 500 feet of elevation gain.
Table of Contents
- Why Coffee Water Temperature Decides How Your Cup Tastes
- Choosing a Coffee Water Temperature Thermometer That Actually Reads True
- How to Calibrate a Coffee Thermometer in Three Steps
- Where to Measure Pour-Over Water Temperature
- Scace Device Espresso Temperature Measurement Explained
- Environmental Factors and Inconsistent Readings: What to Fix First
- Brew With Confidence at Third Space Coffee
- Frequently Asked Questions
Why Coffee Water Temperature Decides How Your Cup Tastes
Water temperature is the biggest lever you can pull on coffee flavor, and most home brewers never check it. Temperature changes what lands in the cup more than most home brewers expect. Learning how to measure coffee water temperature accurately can help you fix a brew that tastes flat, sour, or bitter.
The 195-205°F Window and What Happens Outside It
The Specialty Coffee Association recommends brewing water between 195°F and 205°F. Inside that window, water dissolves the good stuff in coffee grounds at a steady rate. Below it, you get under-extraction: sour, thin, salty coffee.
Small swings matter more than people expect. A few degrees cooler shifts your cup toward acidity. A few degrees hotter pushes it toward bitterness.
Kettle Temperature vs. Slurry Temperature: A Difference That Changes Everything
Here is the part most guides skip. The water in your kettle is not the water touching your coffee.
- Kettle temperature is what your thermometer reads in the pot.
- Slurry temperature is the actual mix of water and grounds during the brew.
- Brew temperature at the coffee bed usually runs cooler than the kettle.
Water loses heat the moment it leaves the spout. It hits a cool dripper, a cool carafe, and room-temperature grounds.
For a deeper look at the target range, see our guide to the best water temperature for brewing coffee.
Choosing a Coffee Water Temperature Thermometer That Actually Reads True
A coffee water temperature thermometer needs two things: accuracy and speed. Accuracy means the reading is correct. Speed means you get it before the water cools. Most cheap thermometers fail on one or both, and the spec sheet rarely tells you which.
Digital vs. Analog: Which One Belongs in Your Kit
Digital is generally the more practical choice for brewing.
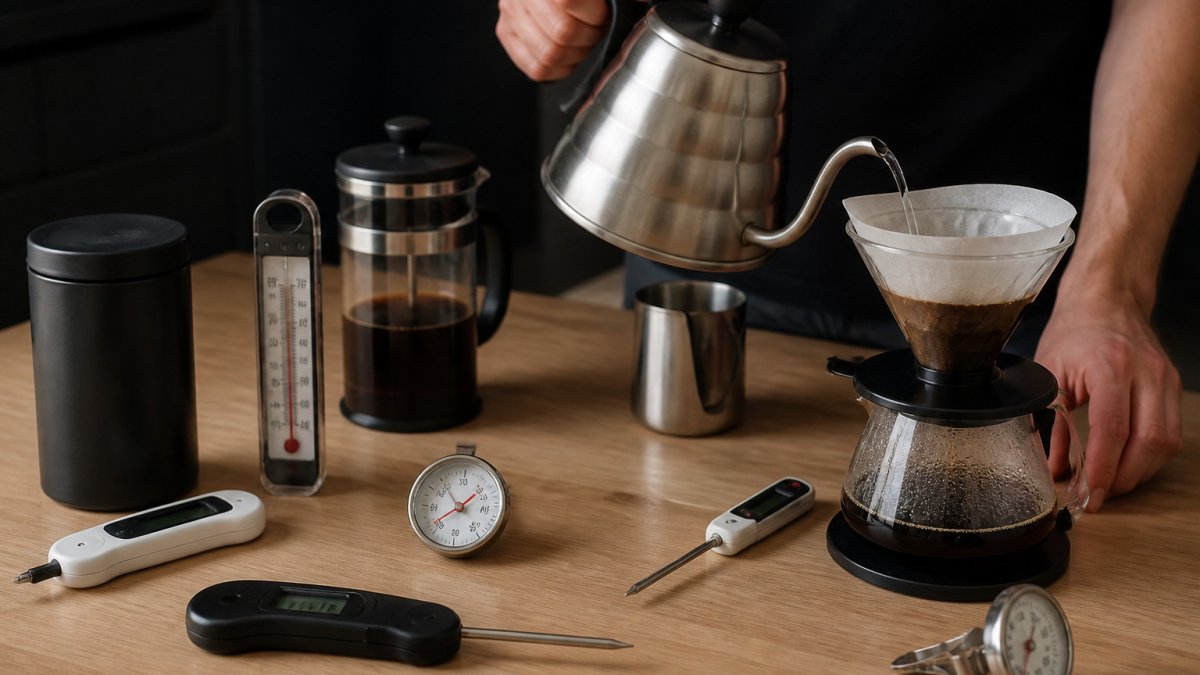
- Digital instant-read thermometers show exact degrees on a digital display and respond in seconds.
- Analog dial thermometers are slower, harder to read precisely, and drift over time.
- Built-in kettle sensors are convenient but often off by several degrees.
A digital instant-read thermometer with a thin probe is the practical pick. It fits into a kettle spout, a slurry, or a portafilter basket.
Sensor Types: Thermocouple vs. Thermistor vs. RTD
This is the part most buying guides skip, and it is the part that decides whether your reading is useful.
- Thermocouple: two dissimilar metals joined at a tip generate a tiny voltage proportional to temperature. Response time is very fast, often under a second for a thin exposed junction, and the range is wide. The trade-off is that raw thermocouples are less linear and need cold-junction compensation, so cheap units can drift. Good for spot-checking a pour or a group head.
- Thermistor: a resistor whose resistance changes with temperature. Very accurate in the narrow band around brewing temperatures, stable over time, and inexpensive. Response time is slower than a bare thermocouple but fast enough for slurry checks. This is what most quality instant-read kitchen thermometers use.
- RTD (resistance temperature detector, usually PT100 or PT1000): a platinum element with excellent linearity and long-term stability. Slower to respond than a thermocouple and more expensive, but the most trustworthy for repeatable readings. Common in lab and prosumer gear.
For brewing, a fast thermistor or a thin thermocouple is the sweet spot. An RTD is worth it if you want one thermometer you calibrate rarely and trust for years.
Probe Diameter and Mass: Why Thin Wins
A thick probe carries more thermal mass, so it takes longer to reach the temperature of the water around it. In a kettle spout or a shallow slurry, that lag is the difference between reading the water now and reading it ten seconds ago. A thinner probe generally responds faster than a thicker one. Thin also means less disturbance when you probe a coffee bed.
Accuracy vs. Response Time: The Spec Nobody Reads
Two thermometers can both claim accuracy and behave very differently. Accuracy tells you how close the reading is to the true temperature. Response time tells you how fast the sensor catches up.
A slow sensor reads the temperature from ten seconds ago. By then, your pour-over has already cooled. Look for a fast response time first, then confirm accuracy with a calibration check.
Calibrate on a schedule, not just once.
What the Spec Sheet Actually Tells You
- Accuracy spec: look for a stated tolerance, such as ±1°F or ±2°F. A thermometer with no stated tolerance is a guess.
- Resolution vs. accuracy: a display that reads to 0.1°F is not accurate to 0.1°F. Resolution is how finely it displays; accuracy is how close it is.
- Response time spec: often given as a time constant (the time to reach 63% of a step change). Under two seconds is good for brewing; under one second is excellent.
Built-In Kettle Sensors and PID Readouts
Electric kettles with a set temperature and a digital readout are convenient, but their sensor may sit away from the stream you pour, so the displayed number can differ from what leaves the spout. Treat the kettle display as a setpoint, not a measurement, and verify with a handheld probe before you trust it for dialing in.
How to Calibrate a Coffee Thermometer in Three Steps
Calibration takes about five minutes and saves you from chasing flavor problems that are really measurement problems. Do it monthly, and after any drop or long storage.
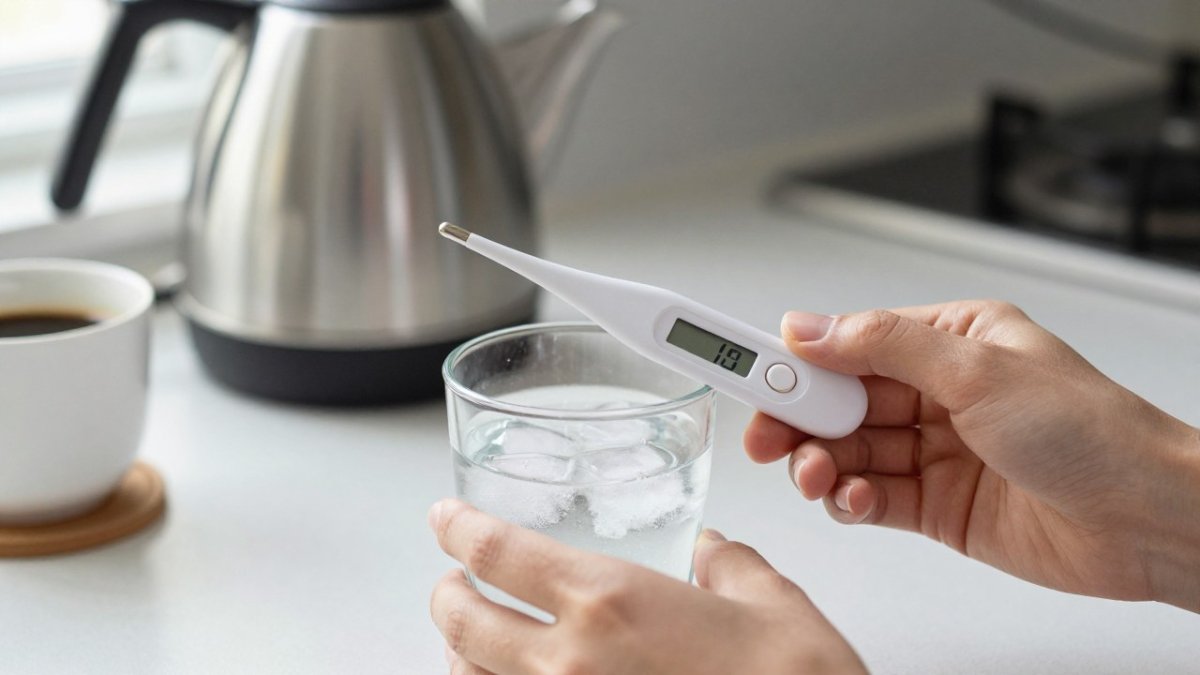
The Ice-Water Bath and Boiling-Point Checks
- Ice-water bath check. Fill a glass with crushed ice and a little water. Stir for a minute. Insert the probe without touching the glass. It should read 32°F (Mercury Thermometer Alternatives: Verification Methods for Alternative Thermometers | NIST).
- Boiling-point check. Bring water to a rolling boil. Insert the probe and read the temperature. Boiling point shifts with elevation, so confirm your local boiling point before judging the result.
- Adjust or replace. If your thermometer has a calibration nut or reset button, adjust it to match. If it is off by more than a couple of degrees and cannot be adjusted, replace it.
For the full home-brewing routine that puts an accurate thermometer to work, read our home coffee brewing guide.
Calibration takes about five minutes and follows three simple checks.
| Step | What to do | Target or note |
|---|---|---|
| Ice-water bath check | Stir crushed ice and water, insert probe without touching glass | Should read 32°F |
| Boiling-point check | Insert probe in rolling boil and read temperature | Boiling point shifts with elevation |
| Adjust or replace | Use calibration nut or reset button to match | Replace if off by more than a couple degrees |
| Frequency | Calibrate monthly and after any drop or long storage | About five minutes each time |
Where to Measure Pour-Over Water Temperature
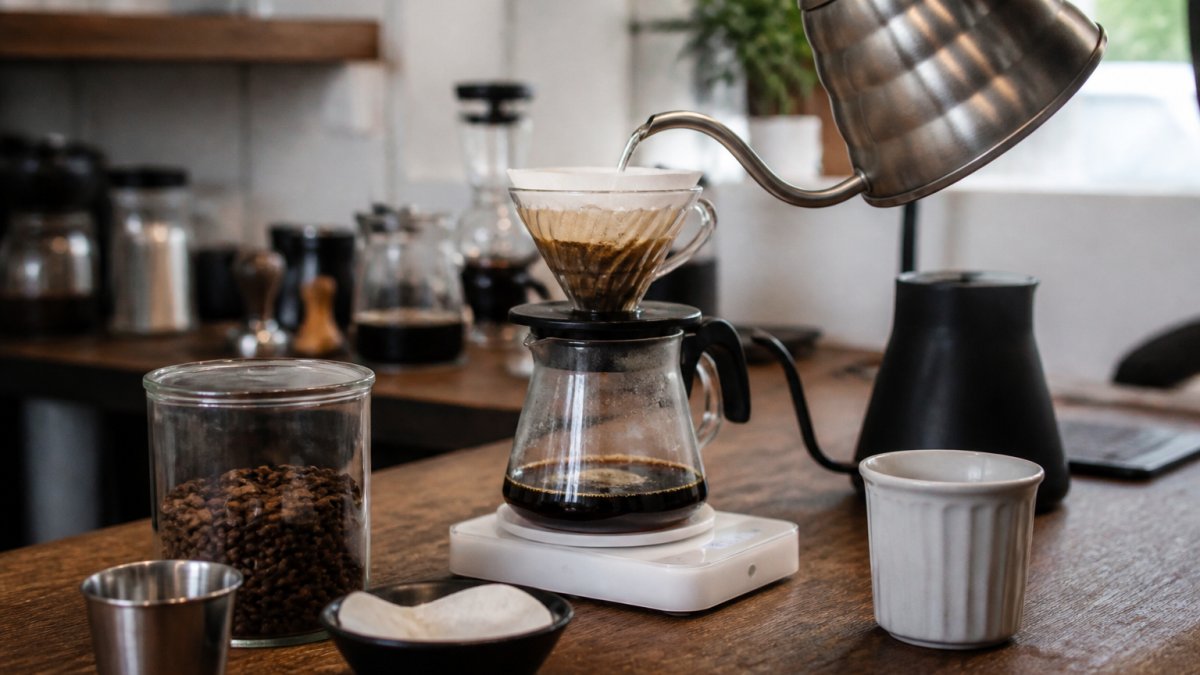
Measure pour-over temperature in two places: the kettle right before you pour, and the coffee slurry mid-brew. The slurry reading is the one that decides flavor. The kettle reading tells you how much heat you are losing before the water reaches the bed.
Kettle Spout, Slurry, and the Reading That Matters
- Kettle spout: slide the probe just inside the spout for a quick pre-pour check.
- Slurry: insert the probe into the wet coffee bed right after your bloom pour.
- Dripper wall: avoid it. The ceramic or glass runs cooler than the slurry and skews the reading.
A common mistake is measuring at the dripper wall and concluding the brew is too cool. In practice, the center of the bed runs hotter. Probe the middle, and keep the probe off the metal or ceramic.
If your numbers look right but the cup still tastes off, our guide to pour-over extraction fixes walks through what to adjust next. Choosing the right beans matters too, and our guide to coffee for pour-over brewing covers that.
Scace Device Espresso Temperature Measurement Explained
A Scace device is a calibrated thermofilter that mimics a portafilter and measures water temperature at the group head. It is a common tool for testing espresso machines. For home baristas, the practical approach is simpler.
Group Head vs. Puck Temperature on a Home Machine
- Group head temperature is the water temperature as it exits the machine.
- Puck temperature is what the coffee bed actually reaches during the shot.
On a home machine, a PID controller keeps brew temperature steady, but the group head can still run hot or cold between shots. Flush a little water before pulling a shot to bring the group head to thermal equilibrium. Then measure with a probe held under the group head, or rely on a machine with a built-in sensor you have verified.
Thermal mass matters here.
Environmental Factors and Inconsistent Readings: What to Fix First
Inconsistent readings usually come from technique and environment, not a broken thermometer. Fix these before you buy new gear, and work through them in order, the first two explain most cases.
Why the Same Kettle Gives You Different Numbers
If you probe the same kettle twice and get different readings, the thermometer is rarely the culprit. The usual causes, roughly in order of likelihood:
- Probe depth and position. A probe resting against the kettle wall or the base reads the metal, not the water. The wall runs cooler than the center, and the base runs hotter near the element. Keep the tip in the middle of the water column.
- Stirring and stratification. Water in a kettle is not one temperature. Hotter water rises, cooler water sinks, and the element creates local hot spots. Stir briefly, then probe, or probe in the same spot every time so your readings are comparable.
- Timing relative to the heat cycle. An electric kettle cycles on and off. A reading taken just after the element cuts off can be higher than one taken a minute later. Standardize when you measure.
- Probe contact time. A slow sensor still climbing when you pull it out reads low. Hold the probe in the water until the number stops moving.
- Residual water in the kettle. A kettle with a little cool water left in it dilutes the next batch and drags the reading down.
Environmental Factors That Move the Reading
- Ambient room temperature and drafts: a cool kitchen or an open window pulls heat from the kettle, the dripper, and the stream. A 65°F room and a 78°F room produce different slurry temperatures from the same kettle setting.
- Altitude: boiling point drops roughly 1.8°F per 500 feet of elevation gain. At higher elevations, water boils at a lower temperature, which narrows the headroom within the brewing window. A boiling-point calibration check must use your local boiling point, not 212°F.
- Preheating: a cold ceramic dripper or glass carafe absorbs heat from the first pour. Rinse them with hot water first so the water reaching the bed is closer to the kettle reading.
A Short Troubleshooting Sequence
When readings look wrong, run this before replacing anything:
- Recalibrate with an ice-water bath. If it reads 32°F, the thermometer is probably fine.
- Probe the same spot in the same way three times. If the numbers converge, the earlier spread was technique.
- Preheat the dripper and carafe, then compare kettle and slurry readings again.
- Check the battery if the display flickers or the reading jumps.
A thermometer that reads wildly different numbers in the same setup is usually the victim of inconsistent technique. Standardize where you probe, preheat everything, and check again.
Brew With Confidence at Third Space Coffee
Measuring temperature is the difference between guessing and knowing. Once your thermometer is calibrated and you know where to probe, you can dial in sweetness and acidity on purpose instead of by luck.
That same care goes into every cup we pour. If you want to put these numbers to work at home, order our pour over setup and brew the same way we do.
Get started with Third Space Coffee and taste the difference accurate brewing makes.
Frequently Asked Questions
What is the perfect temperature for coffee water?
The Specialty Coffee Association recommends brew water between 195°F and 205°F, with 200°F a reliable starting point for most methods. Within that range, hotter water pulls more sweetness and acidity from the grounds, while cooler water slows extraction. Light roasts usually reward the upper end, dark roasts the lower. Measure at the slurry, not just the kettle, because water loses heat as it travels from spout to bed.
Is a kettle's temperature display accurate enough for brewing coffee?
Variable-temperature kettles are convenient but their built-in sensors read the water near the heating element, not at the spout. The display and the water reaching your coffee can differ. For pour-over, verify once with a calibrated instant-read thermometer plunged into the slurry. If the gap is consistent, you can adjust your setpoint and trust the display for daily brewing. Recheck after descaling or a move to a different altitude.
How do you measure the temperature of water exiting an espresso machine?
A Scace device is the standard tool: it threads into the group head like a portafilter and simulates a puck's flow resistance while a thermocouple logs the water temperature at the shower screen. Home users without one can place a thermocouple probe against the group head or use a naked portafilter with a probe in the stream, though readings will be less precise. Flush the group for a few seconds first so the reading reflects stable thermal equilibrium.
How can you fix inconsistent thermometer readings?
Start with calibration: an ice-water bath should read 32°F and boiling water 212°F at sea level. If either check is off by more than 2°F, recalibrate or replace the thermometer. Then control the variables: stir the water before measuring, keep the probe off the vessel walls, and give slow sensors time to settle. A fast-responding probe reduces the guesswork that makes readings jump around.